

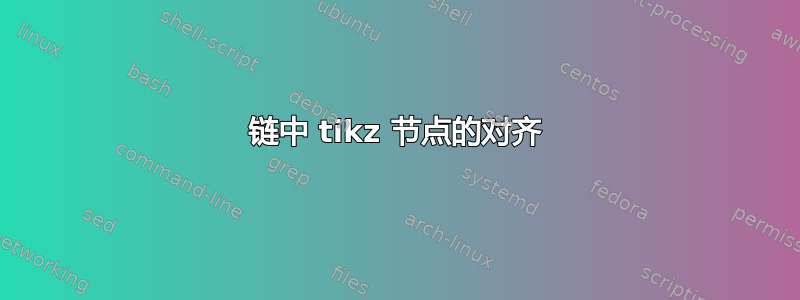
如何在图中对齐向右链中节点的北锚tikz?
正如下面的例子所示,默认情况下它们似乎与中心锚点对齐。
\documentclass[tikz]{standalone}

\usetikzlibrary{shapes.multipart,chains,}

\tikzset{
  token/.style={
    rectangle split,
    rectangle split parts=2,
    rectangle split part fill={cyan!25,yellow!50},
    rectangle split ignore empty parts,
    draw,
  },
}

\begin{document}

\begin{tikzpicture}[start chain=going right,node distance=1mm]
  \node[on chain,token] {TWhile};
  \node[on chain,token] {TLParen};
  \node[on chain,token] {TId\nodepart{two}ip};
  \node[on chain,token] {TEq};
  \node[on chain,token] {TId\nodepart{two}z};
  \node[on chain,token] {TRParen};
  \node[on chain,token] {TPlusPlus};
  \node[on chain,token] {TId\nodepart{two}ip};
\end{tikzpicture}

\end{document}

答案1
它们实际上并没有与中心锚对齐(但中心锚确实位于一条直线上,因为该锚与和锚center处于同一高度)。westeast
in表示放置来自新节点的锚点right,即右边(参见参考文献 1)。going rightwestright=of \tikzchainprevious\tikzchainprevious.east
除了明显的方向(例如above和)之外below right,还存在mid left|right和分别base left|right使用mid|base west|east锚点。这些锚点依赖于包含第一部分节点(或唯一一个节点)的实际文本行。区别仅在于垂直偏移,因为锚点mid位于.5ex其base对应部分的上方。
有了start chain=going base right,您将获得:

这看起来很奇怪,因为:
only
q是蓝色框中唯一具有深度的字母。我建议使用text depth=+0pt, 或者
text depth=\depthof{q}。
对于黄色框,我会应用和font=\vphantom{i}。遗憾的是,键和不影响节点部分(它们的值根本不被考虑),您还可以使用来获得类似于主节点文本的内容:\smashptext depthtext heightfont=\vphantom{ip}text depth=\depthof{q}

另一个相当简单的解决方案是font=\strut对每个部分使用:

如果想要实际使用北锚点(或者更确切地说是north east和north west锚点),可以添加:
\makeatletter
\tikzset{north left/.code =\tikz@lib@place@handle@{#1}{north east}{-1}{0}{north west}{1}}
\tikzset{north right/.code=\tikz@lib@place@handle@{#1}{north west}{1}{0}{north east}{1}}
\tikzset{south left/.code =\tikz@lib@place@handle@{#1}{south east}{-1}{0}{south west}{1}}
\tikzset{south right/.code=\tikz@lib@place@handle@{#1}{south west}{1}{0}{south east}{1}}

\tikzset{west above/.code=\tikz@lib@place@handle@{#1}{south west}{0}{1}{north west}{1}}
\tikzset{west below/.code=\tikz@lib@place@handle@{#1}{north west}{0}{-1}{south west}{1}}
\tikzset{east above/.code=\tikz@lib@place@handle@{#1}{south east}{0}{1}{north east}{1}}
\tikzset{east below/.code=\tikz@lib@place@handle@{#1}{north east}{0}{-1}{south east}{1}}
\makeatother
并将其与 一起使用start chain=going north right。在这种情况下没有什么区别,因为所有节点都具有相同的(文本)高度。
它们可用于将节点排列成一行时将其顶部/底部/左侧/右侧对齐。(这最适合矩形节点形状。)
例如,使用start chain=going south right创建:

参考
- 程序包 PGF 数学错误:未知运算符“o”或“of”(这是关于
positioning图书馆的。) - TikZ 多部分节点:如何为部分/全部部分设置文本属性(不透明度)
代码
\documentclass[tikz,convert=false]{standalone}
\usetikzlibrary{shapes.multipart,chains}
\tikzset{
  token/.style={
    rectangle split,
    rectangle split parts=2,
    rectangle split part fill={cyan!25,yellow!50},
    rectangle split ignore empty parts,
    draw}}

\begin{document}
\begin{tikzpicture}[
  start chain=going base right,
  node distance=1mm,
  every on chain/.append style={
%    font=\strut,
    text depth=+0pt,
    every two node part/.append style={
      font=\strut,
      font=\vphantom{i}
    }
  }
  ]
  \node[on chain,token] {TWhile};
  \node[on chain,token] {TLParen};
  \node[on chain,token] {TId\nodepart{two}i\smash{p}};
  \node[on chain,token] {TEq};
  \node[on chain,token] {TId\nodepart{two}z};
  \node[on chain,token] {TRParen};
  \node[on chain,token] {TPlusPlus};
  \node[on chain,token] {TId\nodepart{two}i\smash{p}};
\end{tikzpicture}
\end{document}