

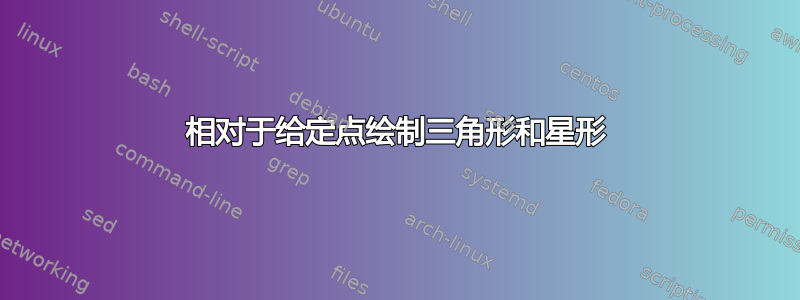
我想给我的学生出一些问题。他们必须找到下一幅画。但因此我必须一个接一个地制作不同的网格。我能得到的最好结果是这样的:
  \documentclass[a4paper]{article}
   \usepackage{tikz,tkz-base, pgf, tkz-euclide}
\usetikzlibrary{arrows, calc,intersections, decorations.pathmorphing}
\usepackage{pgfplots}
\begin{document}
\begin{tikzpicture}[scale=0.8]
\tkzInit[ymin=0,ymax=7,xmin=0,xmax=7]
\tkzClip
\tkzGrid
\node at (2.5,1.5) {$\Delta$};
\filldraw (3,4) rectangle (4,5);
\filldraw (3.5,3.5) circle (0.4);
\end{tikzpicture}
\end{document}
问题是改变比例会使 $\Delta$ 变得大于它所在的盒子。如果网格中有其他形状或 jpeg 与比例相配就更好了(星星、笑脸……)点始终是网格正方形的中心。

答案1
x我不太喜欢在 TikZ 中缩放(甚至不喜欢通过或更改坐标维度的值y)。当我采用这种方法时,我总是会遇到麻烦,因为我执行了某种坐标变换,而这种重新缩放似乎被忽略了。这并不是说缩放等不好;我想,如果我正确理解了 TikZ 中画布变换的工作原理,我可能就不会那么反对这些技术了。
因此,我采取另外两种方法之一。要么我定义自己的缩放单位从而精确控制何时何地生效(有些人会说我过度补偿了,因为我的害怕缩放),或者创建一个standalone可以通过graphicx包缩放的文档。这两种方法也有其缺点:通常我采用第一种方法。
第一种方法可能不是你想要的,因为它无法扩展角色/图形导入到文档中。不过,下面是一个例子来说明我的意思:
\documentclass{article}
\usepackage{tikz}
%% for Circle and Square the placement of the object is
%% relative to the South West corner
\def\aeplaceCircle(#1,#2);{ \draw[fill] (#1,#2) ++ (0.5\aes,0.5\aes) circle (0.4\aes);  }
\def\aeplaceSquare(#1,#2);{ \draw[fill] (#1,#2) rectangle ++(1\aes,1\aes);}
\def\aeplaceChar(#1,#2)#3;{ \path (#1,#2) ++ (0.5\aes,0.5\aes) node {#3}; }
\begin{document}

Here's my grid:

\def\aes{in*0.25}%% my scaling unit!
\begin{tikzpicture}
  \draw[step=1\aes] (0,0) grid (5\aes,5\aes);

  \aeplaceCircle(2\aes,2\aes);
  \aeplaceSquare(3\aes,4\aes);
  \aeplaceChar(4\aes,2\aes){$\triangle$};

\end{tikzpicture}

\end{document}
导致

对于第二种方法,这是standalone我称之为的文档example_02.tex。
\documentclass[border=4pt]{standalone}
\usepackage{tikz}
\usepackage{graphicx}
%% for Circle and Square the placement of the object is
%% relative to the South West corner
\def\aeplaceCircle(#1,#2);{ \draw[fill] (#1,#2) ++ (0.5,0.5) circle (0.4);  }
\def\aeplaceSquare(#1,#2);{ \draw[fill] (#1,#2) rectangle ++(1,1);}
\def\aeplaceChar(#1,#2)#3;{ \path (#1,#2) ++ (0.5,0.5) node[yshift=-3pt] {\scalebox{2.5}{#3}}; }
\begin{document}

\begin{tikzpicture}
  \draw[step=1] (0,0) grid (5,5);

  \aeplaceCircle(2,2);
  \aeplaceSquare(3,4);
  \aeplaceChar(4,2){$\triangle$};

\end{tikzpicture}

\end{document}
在我可以在主文档中使用它之前,我必须单独编译它。然后,我standalone按照如下方式将此文档导入到我的主文档中:
\documentclass{article}
\usepackage[margin=0.5in]{geometry}
\usepackage{graphicx}
\begin{document}

Here's a very large grid:

\includegraphics[scale=2]{example_02}

Here's a moderately sized grid

\includegraphics[height=3in]{example_02}

Here's the grid at its natural size:

\includegraphics{example_02}


\end{document}
结果是

这两种方法都存在各种缺点。
在第一种方法中,我需要\aes在需要缩放的任何地方写下内容。坦率地说,大多数人可能不会忍受这种无稽之谈。尽管如此,由于我为学生创建的文档的性质,我经常采用这种方法。
第二种方法可能有两个缺点。第一个缺点相当小,就是你必须编译两个单独的文档。不过,根据图形和文档之间的偶然性,这可能会变得难以处理——我创建了很多文档,其中的图形极其依赖于上下文,需要在上下文中同时创建。虽然这个网站上的许多人认为这种方法没有问题。然而,第二个缺点是,通过缩放后\includegraphics,导入图像中的任何文本都不会与主文档中的文本匹配(这是实际上TikZ 缩放机制非常好,因为它在缩放时通常会考虑文本和图形之间的差异)。如果没有这样的文本需要担心,那么这实际上不是一个问题。而且,从你对所做事情的描述来看,这似乎是适合你的方法。
简化绘制对象
需要注意的一点是,如果您的对象相对一致,我会定义宏来处理它们的放置。这样,您可以避免使用笨拙的代码(以后可能难以阅读和调试),而使用可以轻松识别您正在做的事情的代码。因此创建了宏:
%% for Circle and Square the placement of the object is
%% relative to the South West corner
\def\aeplaceCircle(#1,#2);{ \draw[fill] (#1,#2) ++ (0.5,0.5) circle (0.4);  }
\def\aeplaceSquare(#1,#2);{ \draw[fill] (#1,#2) rectangle ++(1,1);}
\def\aeplaceChar(#1,#2)#3;{ \path (#1,#2) ++ (0.5,0.5) node[yshift=-3pt] {\scalebox{2.5}{#3}}; }
我\def在这里使用它,因为它允许我使用与 TikZ 中类似的语法编写宏。这可以让你快速地将对象放置在你想要的位置,就像
\aeplaceSquare(3,4);