

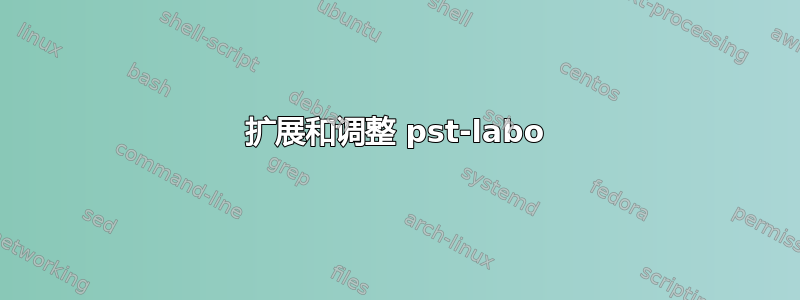
我想做这个

我尝试过pst-labo,但我唯一能做的是(有或没有bouchon):

使用此代码:
\documentclass[11pt]{article}

\usepackage{tkz-euclide}
\usepackage{pgfplots}
\usepackage{pgf}
\usetikzlibrary{backgrounds, calc, shadows, shadows.blur}
\usetikzlibrary{fit,arrows.meta}
\pgfplotsset{compat=newest}

\usepackage{pst-labo}
\begin{document}


\psset{unit=1cm,glassType=erlen}
\pstTubeEssais[substance=\pstBullesChampagne,niveauLiquide1=10]  \pstTubeEssais[substance=\pstBullesChampagne] \pstTubeEssais[substance=\pstBullesChampagne,aspectLiquide1=Champagne]


\end{document}
还有其他包我可以使用吗,还是我应该用 Ti 来绘制所有内容钾Z?
1)制作一个可以改变的压力计。
2) 将气体放入锥形瓶中,将液体放入第三个锥形瓶中。
3) 制作锥形瓶丝锥。
答案1
这是我用 Tikz 制作的版本。我简化了一些细节,但我认为它和你的图像足够相似。唯一缺少的是象征气体的圆圈,但我认为这对你来说并不难复制。
命令如下:
\flask[ <arrow direction> ]{ <position of the flask> }{ <pressure> }{ <text> };
第一个参数是可选的。如果未指定,箭头将向右移动。要使它向左移动,请添加[arrL]上面看到的位置,并使用方括号。在图片的位置(不言自明)之后,我们有压力,您可以在其中输入压力计的值。它接受实际值,因此如果您输入500,它将显示该值。当然,键入130也可以,如下所示,甚至137。最后一个参数是箭头附近的文本,用于命名气体。
输出

代码
\documentclass[margin=10pt]{standalone}
\usepackage{tikz}

\usetikzlibrary{calc, shadings, arrows.meta}

\definecolor{tappo}{RGB}{148,154,110}
\definecolor{lightblue}{RGB}{155,210,220}

\tikzset{
    arrR/.style={-Latex},
    arrL/.style={Latex-}
}

\newcommand\flask[4][arrR]{%
\begin{scope}[shift={(#2)}]
\draw[gray] (-1.8,0) arc (180:0:1.8cm and 6mm);
\begin{scope}
\clip[rounded corners=5mm] (-.5,5) -- (-.5,3.5) -- (-1.8,.5) [sharp corners]-- (-1.8,0) arc (180:360:1.8cm and 6mm) [rounded corners=5mm]--  (1.8,.5) --  (.5,3.5) [sharp corners]-- (.5,5) -- cycle;
\end{scope}

\draw[gray] (.1,4) arc (0:180:1mm and .5mm);
\draw (.1,4.8) -- (.1,4) arc (360:180:1mm and .5mm) -- (-.1,4.8);

\draw[right color=tappo, left color=tappo, middle color=tappo!40] (.4,4.5) -- (.6,5.5) arc (0:180:6mm and 2mm) -- (-.4,4.5) arc (180:360:4mm and 2mm);
\draw[fill=tappo!60] (0,5.5) ellipse (6mm and 2mm);
\draw[fill=lightblue,rounded corners=5mm, fill opacity=.7] (-.5,5) -- (-.5,3.5) -- (-1.8,.5) [sharp corners]-- (-1.8,0) arc (180:360:1.8cm and 6mm) [rounded corners=5mm]--  (1.8,.5) --  (.5,3.5) [sharp corners]-- (.5,5) arc (360:180:5mm and 2mm);
\draw[fill=lightblue, opacity=.5] (.5,5) to[out=-50,in=230, looseness=2] (-.5,5) arc (180:360:5mm and 2mm);

\fill[black] (0,5.5) ellipse (1mm and .5mm);
\draw[fill=lightblue, fill opacity=.5] (.1,6.3) -- (.1,5.5) arc (360:180:1mm and .5mm) -- (-.1,6.3) -- cycle;
\draw[left color=black, right color=black, middle color=gray] (.1,6.5) -- (.1,6.3) arc (360:180:1mm and .5mm) -- (-.1,6.5) -- cycle;

\draw[ultra thick, fill=white!95!black] (0,7.5) circle (1cm);
\node[font=\sffamily\bfseries\scriptsize] at (0,7.9) {hPa};
\foreach \x [evaluate=\x as \angle using int(210-(\x*16))] in {0,...,15}{%
    \pgfmathsetmacro\tick{int(mod(\x,5))}
    \ifnum\x=0
    \draw[very thick] ($(0,7.5)+(\angle:1cm)$) --++ (\angle:-2mm) node[pos=1.8, text=black, font=\tiny] {$\x$};
    \else
    \ifnum\tick=0
    \draw[very thick] ($(0,7.5)+(\angle:1cm)$) --++ (\angle:-2mm) node[pos=1.8, text=black, font=\tiny] {$\x00$};
    \else
    \draw ($(0,7.5)+(\angle:1cm)$) --++ (\angle:-2mm);
    \fi
    \fi
}

\begin{scope}[remember picture,overlay,shift={(0,7.5)},rotate=210-(#3*.16)]
\filldraw[black] (-.2,.03) --++ (1,-.01) --++ (0,-.04) --++ (-1,-.01) --++ (0,-.08) --++ (-.05,0) --++ (0,.22) --++ (.05,0) -- cycle;
\end{scope}

\draw[gray, fill=lightblue!50] (.49,3.9) ellipse (.5mm and 1mm);
\draw[fill=lightblue, fill opacity=.5] (.49,4) -- (2,4) arc (90:-90:.5mm and 1mm) -- (.49,3.8) arc (-90:-270:.5mm and 1mm);
\draw (2,3.8) arc (-90:-270:.5mm and 1mm);

\begin{scope}
\draw[#1, line width=.2mm] (1.5,3.9) -- (2.5,3.9) node[right, font=\scriptsize] {#4};
\draw[fill=lightblue!60] (.8,4.2) -- (1,4.2) -- (1,4.1) -- (.94,4.1) -- (.94,4.05) -- (1,4) arc (360:180:1mm and .25mm) -- (.86,4.05) -- (.86,4.1) -- (.8,4.1) -- cycle;

\draw[fill=lightblue!60] (1,3.81) -- (.95,3.75) -- (.85,3.75) -- (.8,3.81);
\draw[fill=lightblue!60] (.96,3.76) to[out=-50,in=230, looseness=1.8] (.84,3.76) to[out=-15,in=195] cycle;
\draw[fill=lightblue!60] (.94,3.72) to[out=-50,in=230, looseness=2] (.86,3.72) to[out=-15,in=195] cycle;
\end{scope}
\begin{scope}[xshift=4mm]
\draw[fill=lightblue!60] (.8,4.2) -- (1,4.2) -- (1,4.1) -- (.94,4.1) -- (.94,4.05) -- (1,4) arc (360:180:1mm and .25mm) -- (.86,4.05) -- (.86,4.1) -- (.8,4.1) -- cycle;

\draw[fill=lightblue!60] (1,3.81) -- (.95,3.75) -- (.85,3.75) -- (.8,3.81);
\draw[fill=lightblue!60] (.96,3.76) to[out=-50,in=230, looseness=1.8] (.84,3.76) to[out=-15,in=195] cycle;
\draw[fill=lightblue!60] (.94,3.72) to[out=-50,in=230, looseness=2] (.86,3.72) to[out=-15,in=195] cycle;
\end{scope}
\end{scope}
}

\begin{document}
\begin{tikzpicture}

\flask{0,0}{0}{pomp};
\flask[arrL]{5,0}{130}{ether};
\flask[arrL]{10,0}{590}{ether};

\end{tikzpicture}
\end{document}
答案2
我提出了这个版本的波义尔(马略特)定律。


\documentclass{article}
\usepackage[a4paper]{geometry}
\usepackage[garamond]{mathdesign}
\usepackage{pstricks,multido}%
\input{random}        % From Donald Arseneau (on macros/generic on CTAN)
\pagestyle{empty}
\psset{dimen=middle}
\newdimen{\BulleX}
\newdimen{\BulleY}
\newdimen\X
\newdimen\Y
\newdimen\Coor

% Random walk in the unit square (#1 = number of steps)
% idée empruntée à Denis Girou
\def\RandomMolecule#1{%
 \multido{\i=1+1}{#1}{%
 \setrandim\X{-2pt}{2pt}
 \setrandim\Y{-2pt}{2pt}
 \pscircle*[linecolor=blue](\pointless\X,\pointless\Y){0.03} % Initial  point
}}
%
\newcommand\ballon{%
        \pscustom{\psline(-0.75,2.75)(-0.5,2.5)(!-0.5 19.5 cos 1.5 mul)
        \psarc(0,0){1.5}{110}{70}
        \psline(!0.5 19.5 cos 1.5 mul)(0.5,2.5)(0.75,2.75)}}
\newcommand\ballonA{%
         \pscustom{\psline(-0.5,2.5)(!-0.5 19.5 cos 1.5 mul)
        \psarc(0,0){1.5}{110}{70}
        \psline(!0.5 19.5 cos 1.5 mul)(0.5,2.5)}}
\newcommand\bouchon{%
            \pspolygon[fillstyle=solid,fillcolor=lightgray]%
            (-0.53,0.5)(-0.45,-0.5)(0.45,-0.5)(0.53,0.5)}
\newcommand\tubeA{%
            \psline[doubleline=true,doublesep=0.15,linearc=0.25](-2.3,-2.8)(-2.3,0)(2.3,0)(2.3,-2.8)
            }
\newcommand\tubeC{%
            \psline[doubleline=true,doublesep=0.15,linearc=0.25](2.3,-2.8)(2.3,0)(0,0)
            }
\newcommand\tubeD{%
            \psline[doubleline=true,doublesep=0.15,linearc=0.25](-2.3,-2.8)(-2.3,0)(0,0)
            }
\newcommand\tubeB{%
            \psline[doubleline=true,doublesep=0.15,linearc=0.25](0,-2.8)(0,0)(-3,0)}
\newcommand\manometre[2]{%
 \rput(0.2,0){%
                \psline[doubleline=true,doublesep=0.15,doublecolor=cyan!#2](0,0)(0,-5)
                \pscircle[doubleline=true,fillstyle=solid](0,0){1}
                \psarc(0,0){0.65}{-60}{240}
                \multido{\i=-60+30}{11}{\psline(0.65;\i)(0.45;\i)}
                \psline[linewidth=0.05]{->}(!0.5 #1 cos mul 0.5 #1 sin mul)%
                                                                 (!0.5 #1 180 add cos mul 0.5 #1 180 add sin mul)
                \pscircle[fillstyle=solid]{0.1}}}
\newcommand\robinetouvert{
\pspolygon[fillstyle=solid,fillcolor=lightgray,linearc=0.02](-0.3,0.35)(0.3,0.35)(0.3,0.2)(0.1,0.2)
            (0.1,0.07)(-0.1,0.07)(-0.1,0.2)(-0.3,0.2)(-0.3,0.3)
\pspolygon[fillstyle=solid,fillcolor=lightgray,linearc=0.02](-0.1,-0.07)(-0.1,-0.35)(0.1,-0.35)(0.1,-0.07)
}
\newcommand\robinetferme{
\pspolygon[fillstyle=solid,fillcolor=lightgray,linearc=0.02](-0.05,0.3)(-0.05,-0.35)(0.05,-0.35)(0.05,0.3)
\pscircle[fillstyle=solid,fillcolor=lightgray](0,0.25){0.1}}
\pagestyle{empty}
\title{Illustration de la loi de Mariotte}
\date{29 octobre 2011}
% http://pstricks.blogspot.fr/2011/10/la-loi-de-mariotte-une-experience.html
\begin{document}
\psset{unit=0.5}
\noindent Tous les robinets sont fermés. Le ballon A est rempli de gaz, on a fait le vide dans les 2 autres ballons.
\begin{center}
\begin{pspicture}(-8,-2)(6,7)%\psgrid
% On place d'abord le ballon qui contient le gaz initial
\rput(4,0){\psset{fillstyle=solid,fillcolor=cyan!30}
    \psclip{\ballonA}
    \RandomMolecule{600}
    \endpsclip}
% On place d'abord les tubes
\multido{\N=-3.5+5.0}{2}{\rput(\N,3.8){\tubeA}}
\rput(1.5,3.8){\psset{doublecolor=cyan!30}\tubeC}
\rput(-6.2,3.8){\tubeB}
% on place les robinets
\uput[u](1.5,4.2){R1}
\uput[u](-3.5,4.2){R2}
\uput[u](-8,4.2){R3}
\rput(1.5,3.8){\robinetferme}
\rput(-8,3.8){\robinetferme}
\rput(-3.5,3.8){\robinetferme}
% On place le manomètre
\rput(4,6){\manometre{-30}{30}}
% On redessine ensuite les trois ballons avec leurs bouchons
\multido{\i=-6+5}{3}{\rput(\i,0){\ballon}\rput(\i,2.25){\bouchon}}
\rput(4,0){A}\rput(-1,0){B}\rput(-6,0){C}
\uput[r](5.25,6){$\mathrm{P_0}$}
\end{pspicture}
\end{center}
On ouvre le robinet 1, la pression est divisée par 2 :
\begin{center}
\begin{pspicture}(-8,-2)(6,7)%\psgrid
% On place d'abord le ballon qui contient le gaz initial
\rput(4,0){\psset{fillstyle=solid,fillcolor=cyan!20}
    \psclip{\ballonA}
    \RandomMolecule{300}
    \endpsclip}
\rput(-1,0){\psset{fillstyle=solid,fillcolor=cyan!20}
    \psclip{\ballonA}
    \RandomMolecule{300}
    \endpsclip}
% On place d'abord les tubes
\rput(1.5,3.8){\psset{doublecolor=cyan!20}\tubeA}
\rput(-3.5,3.8){\tubeA\psset{doublecolor=cyan!20}\tubeC}
\rput(-6.2,3.8){\tubeB}
% on place les robinets
\uput[u](1.5,4.2){R1}
\uput[u](-3.5,4.2){R2}
\uput[u](-8,4.2){R3}
\rput(1.5,3.8){\robinetouvert}
\rput(-8,3.8){\robinetferme}
\rput(-3.5,3.8){\robinetferme}
% On place le manomètre
\rput(4,6){\manometre{-135}{20}}
% On redessine ensuite les trois ballons avec leurs bouchons
\multido{\i=-6+5}{3}{\rput(\i,0){\ballon}\rput(\i,2.25){\bouchon}}
\rput(4,0){A}\rput(-1,0){B}\rput(-6,0){C}
\uput[r](5.25,6){$\mathrm{P_1=\displaystyle\frac{P_0}{2}}$}
\end{pspicture}
\end{center}
On ouvre le robinet 2, la pression initiale est divisée par 3 :
\begin{center}
\begin{pspicture}(-8,-2)(6,7)%\psgrid
% On place d'abord le ballon qui contient le gaz initial
\rput(4,0){\psset{fillstyle=solid,fillcolor=cyan!10}
    \psclip{\ballonA}
    \RandomMolecule{200}
    \endpsclip}
\rput(-6,0){\psset{fillstyle=solid,fillcolor=cyan!10}
    \psclip{\ballonA}
    \RandomMolecule{200}
    \endpsclip}
\rput(-1,0){\psset{fillstyle=solid,fillcolor=cyan!10}
    \psclip{\ballonA}
    \RandomMolecule{200}
    \endpsclip}
% On place d'abord les tubes
\rput(1.5,3.8){\psset{doublecolor=cyan!10}\tubeA}
\rput(-3.5,3.8){\psset{doublecolor=cyan!10}\tubeA}
\rput(-8.5,3.8){\psset{doublecolor=cyan!10}\tubeC}
% on ajuste l'extrémité du tube de sortie
\psline[doubleline=true,doublesep=0.15](-8.05,3.8)(-9.2,3.8)
% on place les robinets
\uput[u](1.5,4.2){R1}
\uput[u](-3.5,4.2){R2}
\uput[u](-8,4.2){R3}
\rput(1.5,3.8){\robinetouvert}
\rput(-8,3.8){\robinetferme}
\rput(-3.5,3.8){\robinetouvert}
% On place le manomètre
\rput(4,6){\manometre{-190}{10}}
% On redessine ensuite les trois ballons avec leurs bouchons
\multido{\i=-6+5}{3}{\rput(\i,0){\ballon}\rput(\i,2.25){\bouchon}}
\rput(4,0){A}\rput(-1,0){B}\rput(-6,0){C}
\uput[r](5.25,6){$\mathrm{P_2=\displaystyle\frac{P_0}{3}}$}
\end{pspicture}
\end{center}
\end{document}
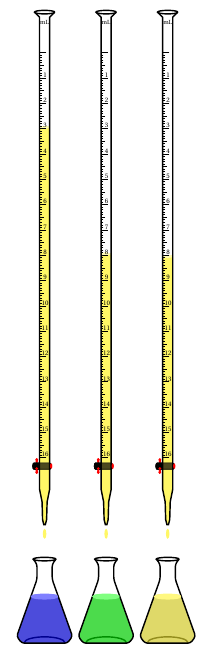
答案3
晚上好,
我曾经面临同样的情况。我想表示酸碱剂量,但使用 pst-labo 无法完全实现我的要求。我提出了一个解决方案,使用 tikz 并创建所有具有易于使用选项的实验室仪器。这个可以改进的代码具有模拟效果,考虑到这一点,我使用 tikz 创建了一个实验室包。(我使用translate.google)
\documentclass[12pt,a4paper]{article}
\usepackage[utf8]{inputenc}
\usepackage[francais]{babel}
\usepackage[T1]{fontenc}
\usepackage{amsmath}
\usepackage{amsfonts}
\usepackage{amssymb}
\usepackage{graphicx}
\usepackage{fourier}\usepackage{tkz-fct}
\usepackage[left=1cm,right=1cm,top=1cm,bottom=1cm]{geometry}
%%%
%%%
%%%
\newcommand{\thecommand}[4]{\tikzpicture[x=1.0cm,y=1.0cm,scale=#4]
%%%  erlenmeyer
\draw[thick](0.45,-4)arc(0:360: .45 and .07);
\draw[thick](0.8,-7.3)arc(0:180: .8 and .23);
\fill[thick,#3!80!black,rounded corners = 1.5 pt,fill opacity=.7](-0.51,-5.4)--(-1.1,-7.05)--(-.9,-7.32)--(.9,-7.32)--(1.1,-7.05)--(0.51,-5.4)--cycle;
\draw[shift={(-.05,0)},thick,rounded corners = 1.5 pt](-0.4,-4)--++(0.15,-0.2)--++(0,-0.6)--++(-0.8,-2.25)--++(0.2,-0.27)--++(1.8,0)--++(0.2,0.27)--++(-0.8,2.25)--++(0,0.6)--++(0.15,0.2);
\filldraw[thick,#3!50](0.515,-5.48)arc(0:360: .515 and .09);
%%%%  erlen

%% solution dans burette
\foreach \z in{ 1,2,...,16}{
\fill[#2!60](-.2,16.06-#1)--
(-.2,16.06-17.3)--
(-.2+0.1,16.06-17.3-.5)--
(-.2+0.1+0.02,16.06-17.3-.5-.7)--
(-.2+0.1+0.02+0.05,16.06-17.3-.5-.7-.2)--
(-.2+0.1+0.02+0.05+0.06,16.06-17.3-.5-.7-.2)--
(-.2+0.1+0.02+0.05+0.06+0.05,16.06-17.3-.5-.7)--
(-.2+0.1+0.04+0.05+0.06+0.05,16.06-17.3-.5)--
(-.2+0.2+0.04+0.05+0.06+0.05,16.06-17.3)--(-.2+0.2+0.04+0.05+0.06+0.05,16.06-#1);
\fill[#2!30](0.207,16.045-#1)arc(0:360: .209 and .05);}
% Goutte
\fill[#2!60](0,-3.)circle(.07 and .2);
%% solution dans burette

%% Contours Burette
\draw[color=#2][color=black,thick](-.4,17.6)--(-.2,17.4)--
(-.2,16.06-17.3)--
(-.2+0.1,16.06-17.3-.5)--
(-.2+0.1+0.02,16.06-17.3-.5-.7)--
(-.2+0.1+0.02+0.05,16.06-17.3-.5-.7-.2)--
(-.2+0.1+0.02+0.05+0.06,16.06-17.3-.5-.7-.2)--
(-.2+0.1+0.02+0.05+0.06+0.05,16.06-17.3-.5-.7)--
(-.2+0.1+0.04+0.05+0.06+0.05,16.06-17.3-.5)--
(-.2+0.2+0.04+0.05+0.06+0.05,16.06-17.3)--(-.2+0.2+0.04+0.05+0.06+0.05,17.4)--(0.2+0.04+0.05+0.06+0.05,17.4+.2);
\draw[thick](0.4,17.6)arc(0:360: .4 and .07);
%% Contours Burette

%% graduation Burette
\foreach \z in {0.1,0.2,...,16}{
\draw[shift={(0,\z)},color=black] (-3pt,0pt) -- (-6pt,0pt);}
\foreach \z in {0.5,...,16}{
\draw[shift={(0,\z)},color=black] (-1pt,0pt) -- (-6pt,0pt);}
\foreach \z in {0,...,16}{
\draw[shift={(0,\z)},color=black] (2pt,0pt) -- (-6pt,0pt);}
\foreach \z/\a in {0/16,1/15,2/14,3/13,4/12,5/11,6/10,7/9,8/8,9/7,10/6,11/5,12/4,13/3,14/2,15/1,16/ }{
\draw[shift={(0.02,\z-.1)},color=black] node[above,scale=#4] {\scriptsize $\a$};}
\draw[shift={(0.0,17)},color=black] node[above,scale=.9,scale=#4] {\scriptsize mL};
%
%% graduation Burette
%%%  Robinet
\fill[red,shift={(-0.57,-0.2)}](0.26,-.325)circle(.045 and .11);
\fill[red,shift={(-0.57,0.2)}](0.26,-.325)circle(.045 and .11);
\fill[red,shift={(-0.57,0.25)}](0.26,-.325)circle(.06 and .06);
\fill[red,shift={(-0.57,-0.25)}](0.26,-.325)circle(.06 and .06);
%%
\draw[color=black,fill=black,fill opacity=0.7] (0-.42,-0.2)--(0.2,-0.2)arc(-90:-10: .05 and -.06)--(.248,-.25)arc(-90:60: -.03 and -.09)--(.241,-.42)arc(0:90: .03 and -.043)--(.2,-.455)--(-.42,-.455)arc(-90:90: -.05 and .126);
\draw[color=black,fill=black,fill opacity=1] (0-.42,-0.2)--(-0.2,-0.2)--(-.2,-.455)--(-.42,-.455)arc(-90:90: -.05 and .126);
%%%%
\fill[red](0.26,-.325)circle(.045 and .11);
%%

\fill[red,shift={(-0.57,-0.25+.15)}](0.26,-.325)circle(.06 and .06);

%%%  Robinet
\endtikzpicture}

\begin{document}
\thecommand{3}{yellow}{blue}{.5}
\thecommand{8}{yellow}{green}{.5}
\thecommand{8.1}{yellow}{yellow}{.5}
\end{document}
这一切都不太美观。
欲了解更多信息,敬请期待。