

我有一个图,其顶点之间有多条边。

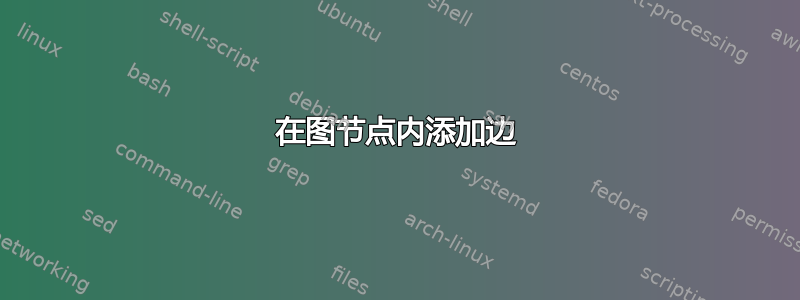
我想让相应的边连接节点内部,例如,像这样:

首先,我尝试使用 添加循环\path[-] (v1) edge [green] (v1);,但没有任何效果。然后我查看了 PGF 手册并发现/tikz/loop,它有in和out参数,但这些参数似乎仅支持圆周和圆外的角度。/tikz/loop above似乎根本没有注册参数。
这是我当前的代码:
\documentclass{article}
\usepackage{polyglossia}
\usepackage{pgf, tikz}
\usetikzlibrary{arrows, automata}
\begin{tikzpicture}[
        > = stealth, % arrow head style
        auto,
        node distance = 1cm, % distance between nodes
        semithick % line style
    ]

    \tikzstyle{every state}=[
        draw = black,
        thick,
        fill = white,
        minimum size = 4mm
    ]

    \node[state] (v1) [] {$1$};
    \node[state] (v2) [right of=v1] {$7$};
    \node[state] (v3) [right of=v2] {$1$};
    \node[state] (v4) [below of=v1] {$1$};

    \path[->] (v1) edge node {} (v2);
    \path[-] (v1) edge [bend left=60, orange] node {} (v2);
    \path[-] (v1) edge [bend left=30, orange] node {} (v2);
    \path[-] (v1) edge [bend left=45, orange] node {} (v2);
    \path[-] (v1) edge [bend left=15, purple] node {} (v2);
    \path[->] (v2) edge node {} (v3);
    \path[-] (v2) edge [bend left=15, purple] node {} (v3);
    \path[-] (v2) edge [bend left=30, purple] node {} (v3);
    \path[-] (v2) edge [bend left=45, orange] node {} (v3);
    \path[-] (v2) edge [bend left=60, orange] node {} (v3);
    \path[-] (v2) edge [bend left=75, orange] node {} (v3);
    \path[-] (v2) edge [bend right=15, teal] node {} (v3);
    \path[-] (v2) edge [bend right=30, teal] node {} (v3);
    \path[->] (v4) edge node {} (v2);
    \path[-] (v4) edge [bend right=15, teal] node {} (v2);
    \path[-] (v4) edge [bend right=30, teal] node {} (v2);
    \path[-] (v4) edge [bend left=15, purple] node {} (v2);
\end{tikzpicture}
\end{document}
通过进一步阅读手册,我尝试添加命名节点,以便可以在边中引用它们:
\begin{tikzpicture}[
        > = stealth, % arrow head style
        % shorten > = 1pt, % don't touch arrow head to node
        auto,
        node distance = 1cm, % distance between nodes
        semithick % line style
    ]

    \node[state] (v1) [] {$1$};
    \node[state] (v2) [right of=v1] {$7$};
    \node[state] (v3) [right of=v2] {$1$};
    \node[state] (v4) [below of=v1] {$1$};

    \path[->] (v1) edge (v2);
    \draw (v1) edge[bend left=15, purple] node {} (v2) node[pos=0, name=v1bl15s] {} node[pos=1, name=v1bl15t] {};
    \draw (v1) edge[bend left=30, orange] node {} (v2) node[pos=0, name=v1bl30s] {} node[pos=1, name=v1bl30t] {};
    \draw (v1) edge[bend left=45, orange] node {} (v2) node[pos=0, name=v1bl45s] {} node[pos=1, name=v1bl45t] {};
    \draw (v1) edge[bend left=60, orange] node {} (v2) node[pos=0, name=v1bl60s] {} node[pos=1, name=v1bl60t] {};
    \path[->] (v2) edge node {} (v3);
    \draw (v2) edge[bend left=15, purple] node {} (v3) node[pos=0, name=v2bl15s] {} node[pos=1, name=v2bl15t] {};
    \draw (v2) edge[bend left=30, purple] node {} (v3) node[pos=0, name=v2bl30s] {} node[pos=1, name=v2bl30t] {};
    \draw (v2) edge[bend left=45, orange] node {} (v3) node[pos=0, name=v2bl45s] {} node[pos=1, name=v2bl45t] {};
    \draw (v2) edge[bend left=60, orange] node {} (v3) node[pos=0, name=v2bl60s] {} node[pos=1, name=v2bl60t] {};
    \draw (v2) edge[bend left=75, orange] node {} (v3) node[pos=0, name=v2bl75s] {} node[pos=1, name=v2bl75t] {};
    \draw (v2) edge[bend right=15, teal] node {} (v3) node[pos=0, name=v2br15s] {} node[pos=1, name=v2br15t] {};
    \draw (v2) edge[bend right=30, teal] node {} (v3) node[pos=0, name=v2br30s] {} node[pos=1, name=v2br30t] {};
    \draw (v1bl15t) edge[purple] node {} (v2bl30s);
    \draw (v2bl15t) edge[purple] node {} (v2bl15s);
    \draw (v1bl30t) edge[orange] node {} (v2bl45s);
    \draw (v1bl45t) edge[orange] node {} (v2bl60s);
    \draw (v1bl60t) edge[orange] node {} (v2bl75s);
    \path[->] (v4) edge node {} (v2);
    \draw (v4) edge[bend right=15, teal] node {} (v2) node[pos=0, name=v4br15s] {} node[pos=1, name=v4br15t] {};
    \draw (v4) edge[bend right=30, teal] node {} (v2) node[pos=0, name=v4br30s] {} node[pos=1, name=v4br30t] {};
    \draw (v4) edge[bend left=15, purple] node {} (v2) node[pos=0, name=v4bl15s] {} node[pos=1, name=v4bl15t] {};
\end{tikzpicture}
这没有帮助,所有标签似乎都指向第一个节点。当我切换edgefor时--,名称开始起作用,但它与弯曲不兼容,因为它是一条直线。
答案1
原则上,绘制这些并不困难,但您有大量的节点和连接。因此,这里有一些东西可以帮助您构建解决方案,但这不是一个完整的解决方案。您可以记录边缘与节点边界相交的坐标。这种坐标的数量是巨大的。因此,这里有一些自动标记机制,可以为节点提供节点名称
p-<pos>-<start>-<target>-<bend angle>
其中位置pos为0或1,start表示起始节点,target边结束的节点,bend angle是路径中使用的弯曲角度。讽刺的是,即使这样也不能使名称独一无二,因为 Ti钾我使用的宏中 Z 不存储角度的符号。无论如何,这些坐标可用于通过节点延伸边。
\documentclass{article}
\usepackage{tikz}
\usetikzlibrary{automata}
\begin{document}
\begin{tikzpicture}[
        > = stealth, % arrow head style
        auto,
        node distance = 1cm, % distance between nodes
        semithick % line style
    ]
\makeatletter
\tikzset{autoname0/.code={%
    \tikzset{pos=0,alias=p-0-\tikztostart-\tikztotarget-\tikz@to@bend}},
        autoname1/.code={%
    \tikzset{pos=1,alias=p-1-\tikztostart-\tikztotarget-\tikz@to@bend}%
    }}
\makeatother

    \tikzset{every state/.style={
        draw = black,
        thick,
        fill = white,
        minimum size = 4mm}}

    \node[state] (v1) [] {$1$};
    \node[state] (v2) [right of=v1] {$7$};
    \node[state] (v3) [right of=v2] {$1$};
    \node[state] (v4) [below of=v1] {$1$};

    \path[->] (v1) edge node {} (v2);
    \path[-] (v1) edge [bend left=60, orange] coordinate[autoname0] (aux) coordinate[autoname1](aux) (v2);
    \path[-] (v1) edge [bend left=30, orange] coordinate[autoname0] (aux) coordinate[autoname1](aux) (v2);
    \path[-] (v1) edge [bend left=45, orange] coordinate[autoname0] (aux) coordinate[autoname1](aux) (v2);
    \path[-] (v1) edge [bend left=15, purple] coordinate[autoname0] (aux) coordinate[autoname1](aux) (v2);
    \path[->] (v2) edge coordinate[autoname0] (aux) coordinate[autoname1](aux) (v3);
    \path[-] (v2) edge [bend left=15, purple] coordinate[autoname0] (aux) coordinate[autoname1](aux) (v3);
    \path[-] (v2) edge [bend left=30, purple] coordinate[autoname0] (aux) coordinate[autoname1](aux) (v3);
    \path[-] (v2) edge [bend left=45, orange] coordinate[autoname0] (aux) coordinate[autoname1](aux) (v3);
    \path[-] (v2) edge [bend left=60, orange] coordinate[autoname0] (aux) coordinate[autoname1](aux) (v3);
    \path[-] (v2) edge [bend left=75, orange] coordinate[autoname0] (aux) coordinate[autoname1](aux) (v3);
    \path[-] (v2) edge [bend right=15, teal] coordinate[autoname0] (aux) coordinate[autoname1](aux) (v3);
    \path[-] (v2) edge [bend right=30, teal] coordinate[autoname0] (aux) coordinate[autoname1](aux) (v3);
    \path[->] (v4) edge coordinate[autoname0] (aux) coordinate[autoname1](aux) (v2);
    \path[-] (v4) edge [bend right=15, teal] coordinate[autoname0] (aux) coordinate[autoname1](aux) (v2);
    \path[-] (v4) edge [bend right=30, teal] coordinate[autoname0] (aux) coordinate[autoname1](aux) (v2);
    \path[-] (v4) edge [bend left=20, purple] coordinate[autoname0] (aux) coordinate[autoname1](aux) (v2);
    \foreach \X/\Y in {60/75,45/60,30/45}
    {\draw[orange] (p-1-v1-v2-\X) to[bend right={\X/2+\Y/2}] (p-0-v2-v3-\Y);}
    \foreach \X/\Y in {15/15,30/30}
    {\draw[teal] (p-1-v4-v2-\X) to[bend left={\X/2+\Y/2+30}] (p-0-v2-v3-\Y);}
\end{tikzpicture}
\end{document}

正如我所说,这不是一个完整的解决方案,但也许其中的一些可以在某个地方使用。橙色连接看起来合理,对于青色连接,必须添加角度 v3-v2-v4。
答案2
我不确定一个人是否可以轻松地做你的要求,而无需指定极地锚例如<node>.<angle>对于每一个来说path,这可能相当麻烦。
相反,我建议指向nodes 的中心,让paths 穿过你的nodes,但在图层上绘制这些,并用部分background填充s ,以免过多地干扰内容。nodeopacitynode
我还修改了您的一些设置,因为其中一部分已被弃用:
\tikzstyle{<style name>}[<style content>]已被取代\tikzset{<stlye name>/.style={<style content>}- 库的相对定位键
positioning现在应该用作<direction> = of <node>和节点<direction> of = <node>
% arara: lualatex
\documentclass[margin=3mm, tikz]{standalone}
\usepackage{tikz}
\usetikzlibrary{graphdrawing,backgrounds,positioning}
\tikzset{state/.style={
    draw = black,
    thick,
    fill = white,
    fill opacity=0.6,
    text opacity=1,
    circle,
    minimum size = 4mm
}
}
\begin{document}
\begin{tikzpicture}[
    > = stealth, % arrow head style
    % shorten > = 1pt, % don't touch arrow head to node
    auto,
    node distance = 1cm, % distance between nodes
    semithick % line style
]


\node[state] (v1) [] {$1$};
\node[state] (v2) [right = of v1] {$7$};
\node[state] (v3) [right = of v2] {$1$};
\node[state] (v4) [below = of v1] {$1$};
\begin{scope}[on background layer]
\path[->] (v1) edge node {} (v2);
\path[-] (v1.center) edge [bend left=60, orange] node {} (v2.center);
\path[-] (v1.center) edge [bend left=30, orange] node {} (v2.center);
\path[-] (v1.center) edge [bend left=45, orange] node {} (v2.center);
\path[-] (v1.center) edge [bend left=15, purple] node {} (v2.center);
\path[->] (v2) edge node {} (v3);
\path[-] (v2.center) edge [bend left=15, purple] node {} (v3.center);
\path[-] (v2.center) edge [bend left=30, purple] node {} (v3.center);
\path[-] (v2.center) edge [bend left=45, orange] node {} (v3.center);
\path[-] (v2.center) edge [bend left=60, orange] node {} (v3.center);
\path[-] (v2.center) edge [bend left=75, orange] node {} (v3.center);
\path[-] (v2.center) edge [bend right=15, teal] node {} (v3.center);
\path[-] (v2.center) edge [bend right=30, teal] node {} (v3.center);
\path[->] (v4) edge node {} (v2);
\path[-] (v4.center) edge [bend right=15, teal] node {} (v2.center);
\path[-] (v4.center) edge [bend right=30, teal] node {} (v2.center);
\path[-] (v4.center) edge [bend left=15, purple] node {} (v2.center);
\end{scope}
\end{tikzpicture}
\end{document}

编辑如果由于某种原因,您不喜欢部分不透明度,您可以使用contour通过复制原始文本在字母周围呈现轮廓的包。
% arara: lualatex
\documentclass[margin=3mm, tikz]{standalone}
\usepackage{tikz}
\usepackage{contour}
\usetikzlibrary{graphdrawing,backgrounds,positioning}
\tikzset{state/.style={
    draw = black,
    thick,
    fill = white,
    fill opacity=0,
    text opacity=1,
    circle,
    minimum size = 4mm
}
}
% Distance between original letters and replicates
\contourlength{0.05em}
% Amount of replicates
\contournumber{30}
\begin{document}
\begin{tikzpicture}[
    > = stealth, % arrow head style
    % shorten > = 1pt, % don't touch arrow head to node
    auto,
    node distance = 1cm, % distance between nodes
    semithick % line style
]


\node[state] (v1) [] {\contour{white}{$1$}};
\node[state] (v2) [right = of v1] {\contour{white}{$7$}};
\node[state] (v3) [right = of v2] {\contour{white}{$1$}};
\node[state] (v4) [below = of v1] {\contour{white}{$1$}};
\begin{scope}[on background layer]
\path[->] (v1) edge node {} (v2);
\path[-] (v1.center) edge [bend left=60, orange] node {} (v2.center);
\path[-] (v1.center) edge [bend left=30, orange] node {} (v2.center);
\path[-] (v1.center) edge [bend left=45, orange] node {} (v2.center);
\path[-] (v1.center) edge [bend left=15, purple] node {} (v2.center);
\path[->] (v2) edge node {} (v3);
\path[-] (v2.center) edge [bend left=15, purple] node {} (v3.center);
\path[-] (v2.center) edge [bend left=30, purple] node {} (v3.center);
\path[-] (v2.center) edge [bend left=45, orange] node {} (v3.center);
\path[-] (v2.center) edge [bend left=60, orange] node {} (v3.center);
\path[-] (v2.center) edge [bend left=75, orange] node {} (v3.center);
\path[-] (v2.center) edge [bend right=15, teal] node {} (v3.center);
\path[-] (v2.center) edge [bend right=30, teal] node {} (v3.center);
\path[->] (v4) edge node {} (v2);
\path[-] (v4.center) edge [bend right=15, teal] node {} (v2.center);
\path[-] (v4.center) edge [bend right=30, teal] node {} (v2.center);
\path[-] (v4.center) edge [bend left=15, purple] node {} (v2.center);
\end{scope}
\end{tikzpicture}
\end{document}
