

这个例子这里非常棒(并且根据评论中的实现甚至更好)。
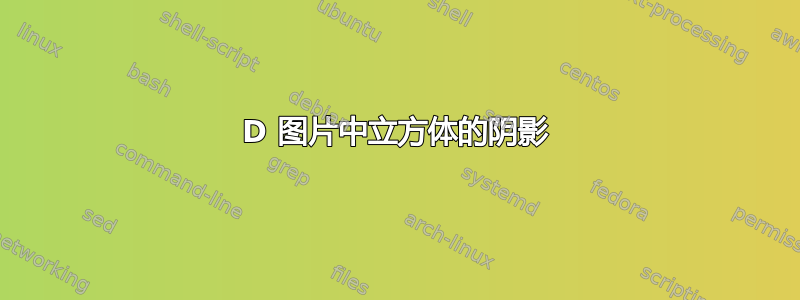
但是,我希望立方体的所有面都具有相同的颜色,但每层立方体的颜色都会发生变化。
以下是代码(以及它的用法的MWE):
% Plane partition
\documentclass{minimal}
\usepackage{tikz}
\usepackage{verbatim}
\usepackage[active,tightpage]{preview}
\PreviewEnvironment{tikzpicture}
\setlength{\PreviewBorder}{5pt}

\begin{comment}
:Title: Plane partition

Illustration of a `plane partition'.

Plane partition: http://mathworld.wolfram.com/PlanePartition.html
\end{comment}

% Three counters
\newcounter{x}
\newcounter{y}
\newcounter{z}

% The angles of x,y,z-axes
\newcommand{\xaxis}{210}
\newcommand{\yaxis}{-30}
\newcommand{\zaxis}{90}

% The top side of a cube
\newcommand{\topside}[3]{%
  \fill[fill=yellow, draw=black,shift={(\xaxis:#1)},shift={(\yaxis:#2)},
  shift={(\zaxis:#3)}] (0,0) -- (30:1) -- (0,1) --(150:1)--(0,0);
}

% The left side of a cube
\newcommand{\leftside}[3]{%
  \fill[fill=red, draw=black,shift={(\xaxis:#1)},shift={(\yaxis:#2)},
  shift={(\zaxis:#3)}] (0,0) -- (0,-1) -- (210:1) --(150:1)--(0,0);
}

% The right side of a cube
\newcommand{\rightside}[3]{%
  \fill[fill=blue, draw=black,shift={(\xaxis:#1)},shift={(\yaxis:#2)},
  shift={(\zaxis:#3)}] (0,0) -- (30:1) -- (-30:1) --(0,-1)--(0,0);
}

% The cube
\newcommand{\cube}[3]{%
  \topside{#1}{#2}{#3} \leftside{#1}{#2}{#3} \rightside{#1}{#2}{#3}
}

% Definition of \planepartition
% To draw the following plane partition, just write \planepartition{ {a, b, c}, {d,e} }.
%  a b c
%  d e
\newcommand\planepartition[1]{
 \setcounter{x}{-1}
  \foreach \a in {#1} {
    \addtocounter{x}{1}
    \setcounter{y}{-1}
    \foreach \b in \a {
      \addtocounter{y}{1}
      \setcounter{z}{-1}
      \foreach \c in {0,...,\b} {
        \addtocounter{z}{1}
      \ifthenelse{\c=0}{\setcounter{z}{-1},\addtocounter{y}{0}}{
        \cube{\value{x}}{\value{y}}{\value{z}}}
      }
    }
  }
}

\begin{document}

\begin{tikzpicture}
\planepartition{{5,3,2,2},{4,2,2,1},{2,1},{1}}
\end{tikzpicture}

\end{document}
我从未使用过 TikZ(而且我目前也没有时间学习它),所以如果有人能帮我更改代码以实现所需的结果,我会非常高兴。
PS我也发布了这个问题这里。
答案1
您选择的这个特定示例实际上对于您想要完成的任务来说并不难阅读。立方体的实际绘制无关紧要。因此您不必太在意 TikZ。
有趣的是,这些层是根据计数器的值绘制的。它在最后一条语句z的定义中分步进行:\planepartition\foreach
\foreach \c in {0,...,\b} {
        \addtocounter{z}{1}
        ...
这告诉我们这里绘制了不同的平面。
宏\c将循环遍历从0到的值\b(其实际值同样无关紧要)。对于每个值,宏\c将保存当前值。我们可以使用它根据图层更改颜色。
目前的颜色有三种定义\topside,\leftside当\rightside它读取时
fill=<color>
我们将这三种情况改成
fill=cubecolor
现在有几种可能性。我们可以\colorlet{cubecolor}{red!\c0}在后面添加类似\addtocounter{z}{1}
\foreach \c in {0,...,\b} {
        \addtocounter{z}{1}
        \colorlet{cubecolor}{red!\c0}
        ...
获得不同深浅的红色:

我们还可以根据 的值定义不同的颜色\c。让我们定义以下宏:
\newcommand*\cubecolors[1]{%
  \ifcase#1\relax
  \or\colorlet{cubecolor}{green}%
  \or\colorlet{cubecolor}{yellow}%
  \or\colorlet{cubecolor}{blue}%
  \or\colorlet{cubecolor}{red}%
  \or\colorlet{cubecolor}{purple}%
  \or\colorlet{cubecolor}{cyan}%
  \else
    \colorlet{cubecolor}{white}%
  \fi
}
并将其添加到同一位置:
\foreach \c in {0,...,\b} {
        \addtocounter{z}{1}
        \cubecolors{\c}
        ...
我们将获得:

答案2
我做了一些小修改,现在您可以获得两种颜色之间的渐变:
代码
\documentclass[tikz,border=5mm]{standalone}
\usepackage{xifthen}
\usepackage{verbatim}

\begin{comment}
:Title: Plane partition

Illustration of a `plane partition'.

Plane partition: http://mathworld.wolfram.com/PlanePartition.html
\end{comment}

% Three counters
\newcounter{x}
\newcounter{y}
\newcounter{z}

% The angles of x,y,z-axes
\newcommand{\xaxis}{210}
\newcommand{\yaxis}{-30}
\newcommand{\zaxis}{90}

% The top side of a cube
\newcommand{\topside}[3]{%
    \pgfmathsetmacro{\cpercent}{\mincolor+(\maxcolor-\mincolor)/(\maxz-1)*#3}
  \fill[fill=cubecolorhigh!\cpercent!cubecolorlow, draw=black,shift={(\xaxis:#1)},shift={(\yaxis:#2)},
  shift={(\zaxis:#3)}] (0,0) -- (30:1) -- (0,1) --(150:1)--(0,0);
}

% The left side of a cube
\newcommand{\leftside}[3]{%
    \pgfmathsetmacro{\cpercent}{\mincolor+(\maxcolor-\mincolor)/(\maxz-1)*#3}
  \fill[fill=cubecolorhigh!\cpercent!cubecolorlow, draw=black,shift={(\xaxis:#1)},shift={(\yaxis:#2)},
  shift={(\zaxis:#3)}] (0,0) -- (0,-1) -- (210:1) --(150:1)--(0,0);
}

% The right side of a cube
\newcommand{\rightside}[3]{%
    \pgfmathsetmacro{\cpercent}{\mincolor+(\maxcolor-\mincolor)/(\maxz-1)*#3}
  \fill[fill=cubecolorhigh!\cpercent!cubecolorlow, draw=black,shift={(\xaxis:#1)},shift={(\yaxis:#2)},
  shift={(\zaxis:#3)}] (0,0) -- (30:1) -- (-30:1) --(0,-1)--(0,0);
}

% The cube
\newcommand{\cube}[3]{%
  \topside{#1}{#2}{#3} \leftside{#1}{#2}{#3} \rightside{#1}{#2}{#3}
}

% Definition of \planepartition
% To draw the following plane partition, just write \planepartition{ {a, b, c}, {d,e} }.
%  a b c
%  d e
\newcommand\planepartition[1]{
 \setcounter{x}{-1}
  \foreach \a in {#1} {
    \addtocounter{x}{1}
    \setcounter{y}{-1}
    \foreach \b in \a {
      \addtocounter{y}{1}
      \setcounter{z}{-1}
      \foreach \c in {0,...,\b} {
        \addtocounter{z}{1}
      \ifthenelse{\c=0}{\setcounter{z}{-1},\addtocounter{y}{0}}{
        \cube{\value{x}}{\value{y}}{\value{z}}}
      }
    }
  }
}

\begin{document}

\pgfmathsetmacro{\maxz}{5}% height of the highest tower
\pgfmathsetmacro{\mincolor}{20}% minimal percentage on gradient from lower to upper color (0-100)
\pgfmathsetmacro{\maxcolor}{80}% maximal percentage on gradient from lower to upper color (0-100)
\colorlet{cubecolorlow}{orange!75!gray}% color definition for low color (see xcolor manual)
\colorlet{cubecolorhigh}{blue!50!lime}% color definition for high color (see xcolor manual

\begin{tikzpicture}
\planepartition{{5,3,2,2},{4,2,2,1},{2,1},{1}}
\end{tikzpicture}

\pgfmathsetmacro{\maxz}{10}
\pgfmathsetmacro{\mincolor}{0}
\pgfmathsetmacro{\maxcolor}{100}
\colorlet{cubecolorlow}{blue}
\colorlet{cubecolorhigh}{red}

\begin{tikzpicture}
\planepartition{{10,3,2,2},{4,2,2,1},{2,1},{1}}
\end{tikzpicture}

\end{document}
输出

答案3
以下是另一个解决方案建议,基于以下贡献:
平面隔断的基础知识作者 Jang Soo Kim
tikz-3dplot包裹:http://www.latex-community.org/know-how/440-tikz-3dplot汤姆·邦巴迪尔的色彩渐变这个问题的解决方案。
使用(例如)\tdplotsetmaincoords{\alpha}{\beta},您可以旋转 3D 图形,使其显示所需的透视图。这对于半透明平面隔断尤其有用,因为使用 Kim 的代码,在这种情况下,平面框架看起来相当混乱。
但是,只有当人们看到正 x、y 和 z 面时,结果才令人满意。我也开始实施所有其他情况。不幸的是,有一些无法预见的挑战,我还没有处理(不过应该不是什么大问题):
例如,如果观察负的 x 和 y 面以及正的 z 面,就必须改变层的创建顺序(例如,从前到后,而不是从后到前)。
包裹
tikz-3dplot有一些问题需要修复,我似乎正在利用这些问题。如果 z 轴应该指向下方,就会出现这些问题 - 在我的示例中它仍然指向上方(见右下图)。
% Title: Plane partition
% =============================================================================
%
% Code taken from and inspired by:
% -----------------------------------------------------------------------------
% http://www.texample.net/tikz/examples/plane-partition/
% http://www.latex-community.org/know-how/440-tikz-3dplot
% https://tex.stackexchange.com/questions/75997/shading-of-cubes-in-3d-picture

\documentclass{minimal}

\usepackage{ifthen}
\usepackage{xcolor}

\usepackage{pgfplots}
\pgfplotsset{compat = 1.3}
\usepackage{tikz-3dplot}

% =============================================================================
% =============================================================================

% Cube side length
\newcommand\CubeLength{1.25}

% =============================================================================

% Cube side: x-value is positive
\newcommand\CubeXpos[6]% {Length}{x-Shift}{y-Shift}{z-Shift}...%
%                     ...{x-Color}{Opacity}
{%
    \ifthenelse{\equal{#5}{0}}%
    {%
        \pgfmathsetmacro{\CubeColorPercent}%
        {%
            \CubeLowCGrad+%
            (\CubeHiCGrad - \CubeLowCGrad)/(\CubeMaxHeight - 1)*%
            (#4/#1)
        }
        %
        \colorlet{CubeColorNew}{CubeHighColor!\CubeColorPercent!CubeLowColor}
    }%
    {%
        \colorlet{CubeColorNew}{#5}
    }
    %
    \colorlet{CubeColor}{CubeColorNew}
    %
    \fill[%
        draw = black, fill = CubeColor, fill opacity = {#6}%
    ] ({#1+#2}, {#3}, {#4}) -- ({#1+#2}, {#1+#3}, {#4})%
        -- ({#1+#2}, {#1+#3}, {#1+#4}) -- ({#1+#2}, {#3}, {#1+#4}) -- cycle;
}

% Cube side: x-value is negative
\newcommand\CubeXneg[6]% {Length}{x-Shift}{y-Shift}{z-Shift}...%
%                     ...{x-Color}{Opacity}
{%
    \ifthenelse{\equal{#5}{0}}%
    {%
        \pgfmathsetmacro{\CubeColorPercent}%
        {%
            \CubeLowCGrad+%
            (\CubeHiCGrad - \CubeLowCGrad)/(\CubeMaxHeight - 1)*%
            (#4/#1)
        }
        %
        \colorlet{CubeColorNew}{CubeHighColor!\CubeColorPercent!CubeLowColor}
    }%
    {%
        \colorlet{CubeColorNew}{#5}
    }
    %
    \colorlet{CubeColor}{CubeColorNew}
    %
    \fill[%
        draw = black, fill = CubeColor, fill opacity = {#6}%
    ] ({#2}, {#3}, {#4}) -- ({#2}, {#1+#3}, {#4})%
        -- ({#2}, {#1+#3}, {#1+#4}) -- ({#2}, {#3}, {#1+#4}) -- cycle;
}

% . . . . . . . . . . . . . . . . . . . . . . . . . . . . . . . . . . . . . . .

% Cube side: y-value is positive
\newcommand\CubeYpos[6]% {Length}{x-Shift}{y-Shift}{z-Shift}...%
%                     ...{y-Color}{Opacity}
{%
    \ifthenelse{\equal{#5}{0}}%
    {%
        \pgfmathsetmacro{\CubeColorPercent}%
        {%
            \CubeLowCGrad+%
            (\CubeHiCGrad - \CubeLowCGrad)/(\CubeMaxHeight - 1)*%
            (#4/#1)
        }
        %
        \colorlet{CubeColorNew}{CubeHighColor!\CubeColorPercent!CubeLowColor}
    }%
    {%
        \colorlet{CubeColorNew}{#5}
    }
    %
    \colorlet{CubeColor}{CubeColorNew}
    %
    \fill[%
        draw = black, fill = CubeColor, fill opacity = {#6}%
    ] ({#1+#2}, {#1+#3}, {#4}) -- ({#2}, {#1+#3}, {#4})%
        -- ({#2}, {#1+#3}, {#1+#4}) -- ({#1+#2}, {#1+#3}, {#1+#4}) -- cycle;
}

% Cube side: y-value is negative
\newcommand\CubeYneg[6]% {Length}{x-Shift}{y-Shift}{z-Shift}...%
%                     ...{y-Color}{Opacity}
{%
    \ifthenelse{\equal{#5}{0}}%
    {%
        \pgfmathsetmacro{\CubeColorPercent}%
        {%
            \CubeLowCGrad+%
            (\CubeHiCGrad - \CubeLowCGrad)/(\CubeMaxHeight - 1)*%
            (#4/#1)
        }
        %
        \colorlet{CubeColorNew}{CubeHighColor!\CubeColorPercent!CubeLowColor}
    }%
    {%
        \colorlet{CubeColorNew}{#5}
    }
    %
    \colorlet{CubeColor}{CubeColorNew}
    %
    \fill[%
        draw = black, fill = CubeColor, fill opacity = {#6}%
    ] ({#2}, {#3}, {#4}) -- ({#1+#2}, {#3}, {#4})%
        -- ({#1+#2}, {#3}, {#1+#4}) -- ({#2}, {#3}, {#1+#4}) -- cycle;
}

% . . . . . . . . . . . . . . . . . . . . . . . . . . . . . . . . . . . . . . .

% Cube side: z-value is positive
\newcommand\CubeZpos[6]% {Length}{x-Shift}{y-Shift}{z-Shift}...%
%                     ...{z-Color}{Opacity}
{%
    \ifthenelse{\equal{#5}{0}}%
    {%
        \pgfmathsetmacro{\CubeColorPercent}%
        {%
            \CubeLowCGrad+%
            (\CubeHiCGrad - \CubeLowCGrad)/(\CubeMaxHeight - 1)*%
            (#4/#1)
        }
        %
        \colorlet{CubeColorNew}{CubeHighColor!\CubeColorPercent!CubeLowColor}
    }%
    {%
        \colorlet{CubeColorNew}{#5}
    }
    %
    \colorlet{CubeColor}{CubeColorNew}
    %
    \fill[%
        draw = black, fill = CubeColor, fill opacity = {#6}%
    ] ({#2}, {#3}, {#1+#4}) -- ({#1+#2}, {#3}, {#1+#4})%
        -- ({#1+#2}, {#1+#3}, {#1+#4}) -- ({#2}, {#1+#3}, {#1+#4}) -- cycle;
}

% Cube side: z-value is negative
\newcommand\CubeZneg[6]% {Length}{x-Shift}{y-Shift}{z-Shift}...%
%                     ...{z-Color}{Opacity}
{%
    \ifthenelse{\equal{#5}{0}}%
    {%
        \pgfmathsetmacro{\CubeColorPercent}%
        {%
            \CubeLowCGrad+%
            (\CubeHiCGrad - \CubeLowCGrad)/(\CubeMaxHeight - 1)*%
            (#4/#1)
        }
        %
        \colorlet{CubeColorNew}{CubeHighColor!\CubeColorPercent!CubeLowColor}
    }%
    {%
        \colorlet{CubeColorNew}{#5}
    }
    %
    \colorlet{CubeColor}{CubeColorNew}
    %
    \fill[%
        draw = black, fill = CubeColor, fill opacity = {#6}%
    ] ({#2}, {#3}, {#4}) -- ({#2+#1}, {#3}, {#4})%
        -- ({#2+#1}, {#3+#1}, {#4}) -- ({#2}, {#3+#1}, {#4}) -- cycle;
}

% -----------------------------------------------------------------------------

% Cube
\newcommand\Cube[9]% {Length}{x-Shift}{y-Shift}{z-Shift}...%
%                 ...{x-Color}{y-Color}{z-Color}{Opacity}{Orientation}
{%  {Length}{x-Shift}{y-Shift}{z-Shift}{Color}{Opacity}

    \ifthenelse{\equal{#9}{PPP}}%
    {%

        \CubeXneg{#1}{#2}{#3}{#4}{white}{0}%
        \CubeYneg{#1}{#2}{#3}{#4}{white}{0}%
        \CubeZneg{#1}{#2}{#3}{#4}{white}{0}%

        \CubeXpos{#1}{#2}{#3}{#4}{#5}{#8}%
        \CubeYpos{#1}{#2}{#3}{#4}{#6}{#8}%
        \CubeZpos{#1}{#2}{#3}{#4}{#7}{#8}%

    }%
    {}

    %\ifthenelse{\equal{#9}{NPP}}%
    %{%
    %
        %\CubeXpos{#1}{#2}{#3}{#4}{white}{0}%
        %\CubeYneg{#1}{#2}{#3}{#4}{white}{0}%
        %\CubeZneg{#1}{#2}{#3}{#4}{white}{0}%
    %
        %\CubeXneg{#1}{#2}{#3}{#4}{#5}{#8}%
        %\CubeYpos{#1}{#2}{#3}{#4}{#6}{#8}%
        %\CubeZpos{#1}{#2}{#3}{#4}{#7}{#8}%
        %
    %}%
    %{}
    %
    %\ifthenelse{\equal{#9}{PNP}}%
    %{%
    %
        %\CubeXneg{#1}{#2}{#3}{#4}{white}{0}%
        %\CubeYpos{#1}{#2}{#3}{#4}{white}{0}%
        %\CubeZneg{#1}{#2}{#3}{#4}{white}{0}%
        %
        %\CubeXpos{#1}{#2}{#3}{#4}{#5}{#8}%
        %\CubeYneg{#1}{#2}{#3}{#4}{#6}{#8}%
        %\CubeZpos{#1}{#2}{#3}{#4}{#7}{#8}%
        %
    %}%
    %{}
    %
    %\ifthenelse{\equal{#9}{NNP}}%
    %{%
    %
        %\CubeXpos{#1}{#2}{#3}{#4}{white}{0}%
        %\CubeYpos{#1}{#2}{#3}{#4}{white}{0}%
        %\CubeZneg{#1}{#2}{#3}{#4}{white}{0}%
    %
        %\CubeXneg{#1}{#2}{#3}{#4}{#5}{#8}%
        %\CubeYneg{#1}{#2}{#3}{#4}{#6}{#8}%
        %\CubeZpos{#1}{#2}{#3}{#4}{#7}{#8}%
%
    %}%
    %{}

    % .........................................................................

    %\ifthenelse{\equal{#9}{PPN}}%
    %{%
    %
        %\CubeXneg{#1}{#2}{#3}{#4}{white}{0}%
        %\CubeYneg{#1}{#2}{#3}{#4}{white}{0}%
        %\CubeZpos{#1}{#2}{#3}{#4}{white}{0}%
    %
        %\CubeXpos{#1}{#2}{#3}{#4}{#5}{#8}%
        %\CubeYpos{#1}{#2}{#3}{#4}{#6}{#8}%
        %\CubeZneg{#1}{#2}{#3}{#4}{#7}{#8}%
        %
    %}%
    %{}
    %
    %\ifthenelse{\equal{#9}{NPN}}%
    %{%
    %
        %\CubeXpos{#1}{#2}{#3}{#4}{white}{0}%
        %\CubeYneg{#1}{#2}{#3}{#4}{white}{0}%
        %\CubeZpos{#1}{#2}{#3}{#4}{white}{0}%
    %
        %\CubeXneg{#1}{#2}{#3}{#4}{#5}{#8}%
        %\CubeYpos{#1}{#2}{#3}{#4}{#6}{#8}%
        %\CubeZneg{#1}{#2}{#3}{#4}{#7}{#8}%
        %
    %}%
    %{}
    %
    %\ifthenelse{\equal{#9}{PNN}}%
    %{%
    %
        %\CubeXneg{#1}{#2}{#3}{#4}{white}{0}%
        %\CubeYpos{#1}{#2}{#3}{#4}{white}{0}%
        %\CubeZpos{#1}{#2}{#3}{#4}{white}{0}%
    %
        %\CubeXpos{#1}{#2}{#3}{#4}{#5}{#8}%
        %\CubeYneg{#1}{#2}{#3}{#4}{#6}{#8}%
        %\CubeZneg{#1}{#2}{#3}{#4}{#7}{#8}%
%
    %}%
    %{}
    %
    %\ifthenelse{\equal{#9}{NNN}}%
    %{%
    %
        %\CubeXpos{#1}{#2}{#3}{#4}{white}{0}%
        %\CubeYpos{#1}{#2}{#3}{#4}{white}{0}%
        %\CubeZpos{#1}{#2}{#3}{#4}{white}{0}%
    %
        %\CubeXneg{#1}{#2}{#3}{#4}{#5}{#8}%
        %\CubeYneg{#1}{#2}{#3}{#4}{#6}{#8}%
        %\CubeZneg{#1}{#2}{#3}{#4}{#7}{#8}%
%
    %}%
    %{}

}

% -----------------------------------------------------------------------------

% Three counters for shifting cubes
\newcounter{CubeCountX}
\newcounter{CubeCountY}
\newcounter{CubeCountZ}

% Set of cubes
\newcommand\CubeSet[7]% {Length}{SetCharacterization}...%
%                    ...{Left-Color}{Right-Color}{Top-Color}...%
%                    ...{Opacity}{Orientation}
{%
    \setcounter{CubeCountX}{-1}
    \foreach \a in {#2}%
    {
        \addtocounter{CubeCountX}{1}
        \setcounter{CubeCountY}{-1}
        \foreach \b in \a%
        {
            \addtocounter{CubeCountY}{1}
            \setcounter{CubeCountZ}{-1}
            \foreach \c in {0, ..., \b}%
            {
                \addtocounter{CubeCountZ}{1}
                \ifthenelse{\c = 0}%
                {%
                    \setcounter{CubeCountZ}{-1}%
                }%
                {%  {Length}...%
                %...{x-Shift}{y-Shift}{z-Shift}...%
                %...{Left-Color}{Right-Color}{Top-Color}%
                %...{Opacity}{Orientation}
                    \Cube{#1}%
                        {#1*\value{CubeCountX}}{#1*\value{CubeCountY}}%
                        {#1*\value{CubeCountZ}}%
                        {#3}{#4}{#5}%
                        {#6}{#7}%
                }
            }
        }
    }
}

% =============================================================================
% =============================================================================

\begin{document}

% -----------------------------------------------------------------------------

\noindent%
%
% Rotate the coordinate system with the help of the package 'tikz-3dplot'
\tdplotsetmaincoords{40}{120}%
%
\begin{tikzpicture}[x = 1.0cm, y = 1.0cm, z = 1.0cm, tdplot_main_coords]
    %
    % Draw the axes
    %
    \draw [dotted, white] (0,0,0) -- (+\CubeLength*1.5, 0, 0);
    \draw [dotted, black] (0,0,0) -- (-\CubeLength*1.5, 0, 0);
    \draw [dotted, white] (0,0,0) -- (0, +\CubeLength*1.5, 0);
    \draw [dotted, black] (0,0,0) -- (0, -\CubeLength*1.5, 0);
    \draw [dotted, white] (0,0,0) -- (0, 0, +\CubeLength*1.5)%
        node [anchor = south, yshift = +10mm, color = black] {OK};
    \draw [dotted, black] (0,0,0) -- (0, 0, -\CubeLength*1.5);
    %
    \draw [{}-{>}] (0,0,0) -- (\CubeLength*1.33, 0, 0)%
        node [anchor = west] {$x$};
    \draw [{}-{>}] (0,0,0) -- (0, \CubeLength*1.33, 0)%
        node [anchor = west] {$y$};
    \draw [{}-{>}] (0,0,0) -- (0, 0, \CubeLength*1.33)%
        node [anchor = west] {$z$};

    % Draw a set of cubes
    \CubeSet{\CubeLength}{{1}}{red}{blue}{green}{0.9}{PPP}
    %
\end{tikzpicture}%
%
\hspace*{1mm}%
%
% Rotate the coordinate system with the help of the package 'tikz-3dplot'
\tdplotsetmaincoords{40}{210}%
%
\begin{tikzpicture}[x = 1.0cm, y = 1.0cm, z = 1.0cm, tdplot_main_coords]
    %
    % Draw the axes
    %
    \draw [dotted, white] (0,0,0) -- (+\CubeLength*1.5, 0, 0);
    \draw [dotted, black] (0,0,0) -- (-\CubeLength*1.5, 0, 0);
    \draw [dotted, white] (0,0,0) -- (0, +\CubeLength*1.5, 0);
    \draw [dotted, black] (0,0,0) -- (0, -\CubeLength*1.5, 0);
    \draw [dotted, white] (0,0,0) -- (0, 0, +\CubeLength*1.5)%
        node [anchor = south, yshift = +10mm, color = black] {OK};
    \draw [dotted, black] (0,0,0) -- (0, 0, -\CubeLength*1.5);
    %
    \draw [{}-{>}] (0,0,0) -- (\CubeLength*1.33, 0, 0)%
        node [anchor = west] {$x$};
    \draw [{}-{>}] (0,0,0) -- (0, \CubeLength*1.33, 0)%
        node [anchor = west] {$y$};
    \draw [{}-{>}] (0,0,0) -- (0, 0, \CubeLength*1.33)%
        node [anchor = west] {$z$};

    % Draw a set of cubes
    \CubeSet{\CubeLength}{{1}}{red}{blue}{green}{0.9}{PPP}
    %
\end{tikzpicture}%
%
\hspace*{1mm}%
%
% Rotate the coordinate system with the help of the package 'tikz-3dplot'
\tdplotsetmaincoords{40}{300}%
%
\begin{tikzpicture}[x = 1.0cm, y = 1.0cm, z = 1.0cm, tdplot_main_coords]
    %
    % Draw the axes
    %
    \draw [dotted, white] (0,0,0) -- (+\CubeLength*1.5, 0, 0);
    \draw [dotted, black] (0,0,0) -- (-\CubeLength*1.5, 0, 0);
    \draw [dotted, white] (0,0,0) -- (0, +\CubeLength*1.5, 0);
    \draw [dotted, black] (0,0,0) -- (0, -\CubeLength*1.5, 0);
    \draw [dotted, white] (0,0,0) -- (0, 0, +\CubeLength*1.5)%
        node [anchor = south, yshift = +10mm, color = black] {OK};
    \draw [dotted, black] (0,0,0) -- (0, 0, -\CubeLength*1.5);
    %
    \draw [{}-{>}] (0,0,0) -- (\CubeLength*1.33, 0, 0)%
        node [anchor = west] {$x$};
    \draw [{}-{>}] (0,0,0) -- (0, \CubeLength*1.33, 0)%
        node [anchor = west] {$y$};
    \draw [{}-{>}] (0,0,0) -- (0, 0, \CubeLength*1.33)%
        node [anchor = west] {$z$};

    % Draw a set of cubes
    \CubeSet{\CubeLength}{{1}}{red}{blue}{green}{0.9}{PPP}
    %
\end{tikzpicture}%
%
\hspace*{1mm}%
%
% Rotate the coordinate system with the help of the package 'tikz-3dplot'
\tdplotsetmaincoords{40}{30}%
%
\begin{tikzpicture}[x = 1.0cm, y = 1.0cm, z = 1.0cm, tdplot_main_coords]
    %
    % Draw the axes
    %
    \draw [dotted, white] (0,0,0) -- (+\CubeLength*1.5, 0, 0);
    \draw [dotted, black] (0,0,0) -- (-\CubeLength*1.5, 0, 0);
    \draw [dotted, white] (0,0,0) -- (0, +\CubeLength*1.5, 0);
    \draw [dotted, black] (0,0,0) -- (0, -\CubeLength*1.5, 0);
    \draw [dotted, white] (0,0,0) -- (0, 0, +\CubeLength*1.5)%
        node [anchor = south, yshift = +10mm, color = black] {Not OK};
    \draw [dotted, black] (0,0,0) -- (0, 0, -\CubeLength*1.5);
    %
    \draw [{}-{>}] (0,0,0) -- (\CubeLength*1.33, 0, 0)%
        node [anchor = west] {$x$};
    \draw [{}-{>}] (0,0,0) -- (0, \CubeLength*1.33, 0)%
        node [anchor = west] {$y$};
    \draw [{}-{>}] (0,0,0) -- (0, 0, \CubeLength*1.33)%
        node [anchor = west] {$z$};

    % Draw a set of cubes
    \CubeSet{\CubeLength}{{1}}{red}{blue}{green}{0.9}{PPP}
    %
\end{tikzpicture}\\\rule{\textwidth}{0.25mm}\\

% -----------------------------------------------------------------------------

\noindent%
%
% Rotate the coordinate system with the help of the package 'tikz-3dplot'
\tdplotsetmaincoords{70}{150}%
%
\begin{tikzpicture}[x = 1.0cm, y = 1.0cm, z = 1.0cm, tdplot_main_coords]
    %
    % Draw the axes
    \draw [->] (0,0,0) -- (3*\CubeLength*1.33, 0, 0) node [anchor = west]%
        {$x$};
    \draw [->] (0,0,0) -- (0, 3*\CubeLength*1.33, 0) node [anchor = west]%
        {$y$};
    \draw [->] (0,0,0) -- (0, 0, 3*\CubeLength*1.33) node [anchor = west]%
        {$z$ OK};
    %
    % Draw a set of cubes
    \CubeSet{\CubeLength}{{3,3,3},{3,2,1},{3,1,1}}%
        {red}{blue}{green}{1.0}{PPP}
    %
\end{tikzpicture}%
%
\hspace*{10mm}
%
% Rotate the coordinate system with the help of the package 'tikz-3dplot'
\tdplotsetmaincoords{70}{330}%
%
\begin{tikzpicture}[x = 1.0cm, y = 1.0cm, z = 1.0cm, tdplot_main_coords]
    %
    % Draw the axes
    \draw [->] (0,0,0) -- (3*\CubeLength*1.33, 0, 0)%
        node [anchor = west] {$x$};
    \draw [->] (0,0,0) -- (0, 3*\CubeLength*1.33, 0)%
        node [anchor = west] {$y$};
    \draw [->] (0,0,0) -- (0, 0, 3*\CubeLength*1.33)%
        node [anchor = west] {$z$: Not OK};
    %
    % Draw a set of cubes
    \CubeSet{\CubeLength}{{3,3,3},{3,2,1},{3,1,1}}%
        {red}{blue}{green}{1.0}{PPP}
    %
\end{tikzpicture}\\\rule{\textwidth}{0.25mm}\\

% -----------------------------------------------------------------------------

\renewcommand\CubeLength{0.75}

\pgfmathsetmacro{\CubeMaxHeight}{5} % Height of the highest tower
\pgfmathsetmacro{\CubeLowCGrad}{1} % Min. gradient from low to high (0 ... 100)
\pgfmathsetmacro{\CubeHiCGrad}{99} % Max. gradient from low to high (0 ... 100)
\colorlet{CubeLowColor}{red} % Definition of the low color
\colorlet{CubeHighColor}{blue} % Definition of the high color
%
\noindent%
%
% Rotate the coordinate system with the help of the package 'tikz-3dplot'
\tdplotsetmaincoords{65}{120}%
%
\begin{tikzpicture}[x = 1.0cm, y = 1.0cm, z = 1.0cm, tdplot_main_coords]
    %
    % Draw the axes
    \draw [->] (0,0,0) -- (4*\CubeLength*1.33, 0, 0)%
        node [anchor = west] {$x$};
    \draw [->] (0,0,0) -- (0, 4*\CubeLength*1.33, 0)%
        node [anchor = west] {$y$};
    \draw [->] (0,0,0) -- (0, 0, 5*\CubeLength*1.33)%
        node [anchor = west] {$z$ OK};
    %
    % Draw a set of cubes
    \CubeSet{\CubeLength}{{5,5,3,4},{4,4,3,3},{3,3,2,1},{1,0,2}}%
        {0}{0}{0}{0.9}{PPP}
    %
\end{tikzpicture}%
%
\hspace*{10mm}%
%
% Rotate the coordinate system with the help of the package 'tikz-3dplot'
\tdplotsetmaincoords{295}{300}%
%
\begin{tikzpicture}[x = 1.0cm, y = 1.0cm, z = 1.0cm, tdplot_main_coords]
    %
    % Draw the axes
    \draw [->] (0,0,0) -- (4*\CubeLength*1.33, 0, 0)%
        node [anchor = west] {$x$};
    \draw [->] (0,0,0) -- (0, 4*\CubeLength*1.33, 0)%
        node [anchor = west] {$y$};
    \draw [->] (0,0,0) -- (0, 0, 5*\CubeLength*1.33)%
        node [anchor = west] {$z$ Not OK, axis mathematically wrong};
    %
    % Draw a set of cubes
    \CubeSet{\CubeLength}{{5,5,3,4},{4,4,3,3},{3,3,2,1},{1,0,2}}%
        {0}{0}{0}{0.9}{PPP}
    %
\end{tikzpicture}

% -----------------------------------------------------------------------------

\end{document}
结果如下:
