

如何改进代码?我可以将变量设为局部变量吗?
\documentclass[12pt,tikz,border=5pt]{standalone}
\usetikzlibrary{calc}

% this is from
% http://tex.stackexchange.com/questions/66125/extract-x-value-from-coordinate-in-tikz
\newdimen\XCoord
\newdimen\YCoord
\newcommand*{\ExtractCoordinate}[1]{\path (#1); \pgfgetlastxy{\XCoord}{\YCoord};}%

% Makro for rectangle specified by two focal points
% (like an ellipse)
\newcommand\rectfoca[4][rounded corners=2mm, ultra thick]{
% #1 optional argument
% default for #1:
%   rounded corners=2mm, ultra thick
%   gets overwritten by given argument
%
% #2 first focal point A:   \coordinate A (x,y)
% #3 second focal point B:  \coordinate B (x,y)
%
% #4 offset of the corners of the rectangle relative to A and B
%       1. Corner of rectangle (A - (#6, #6))
%       2. Corner of rectangle (B + (#6, #6))
%
% Getting Coordinates of A
\ExtractCoordinate{#2}
              \pgfmathsetmacro\Acoordx{\XCoord/28.45274}
              \pgfmathsetmacro\Acoordy{\YCoord/28.45274};
% Uncomment to print x, y coordinates of A
%    \node (xx) at (5,8) {\pgfmathparse{\Acoordx}\pgfmathprintnumber[precision=2]{\pgfmathresult}};
%    \node (yy) at (6,8) {\pgfmathparse{\Acoordy}\pgfmathprintnumber[precision=2]{\pgfmathresult}};
%
% Getting Coordinates of B
    \ExtractCoordinate{#3}
                  \pgfmathsetmacro\Bcoordx{\XCoord/28.45274}
                  \pgfmathsetmacro\Bcoordy{\YCoord/28.45274};
% Uncomment to print x, y coordinates of B
%    \node (xxa) at (5,7) {\pgfmathparse{\Bcoordx}\pgfmathprintnumber[precision=2]{\pgfmathresult}};
%    \node (yya) at (6,7) {\pgfmathparse{\Bcoordy}\pgfmathprintnumber[precision=2]{\pgfmathresult}};
%
% Getting offset
    \pgfmathsetmacro{\OffAB}{#4};
%
% Getting angle (uncomment next comment to print value)
    \pgfmathsetmacro{\ABangle}{atan2(\Bcoordy-\Acoordy,\Bcoordx-\Acoordx)};
%    \node (ang) at (6,6) {\pgfmathparse{\ABangle}\pgfmathprintnumber[precision=2]{\pgfmathresult}};
%
% Getting distance between A and B
    \pgfmathsetmacro{\distAB}{veclen(\Bcoordx-\Acoordx,\Bcoordy-\Acoordy)};
%
% Getting the focus point BS for an angle = 0
    \pgfmathsetmacro{\BScoordx}{\Acoordx + \distAB};
    \pgfmathsetmacro{\BScoordy}{\Acoordy};
%
% Getting the corners of the horizontal (angle = 0) rectangle
    \pgfmathsetmacro\AAcoordx{\Acoordx - \OffAB};
    \pgfmathsetmacro\AAcoordy{\Acoordy - \OffAB};
    \pgfmathsetmacro\BBcoordx{\BScoordx + \OffAB};
    \pgfmathsetmacro\BBcoordy{\BScoordy + \OffAB};
%
% rotate the rectangle around A with the calculated angle
    \draw[#1,rotate around={\ABangle:(\Acoordx,\Acoordy)}]
                                      (\AAcoordx,\AAcoordy) rectangle (\BBcoordx,\BBcoordy);
}

\begin{document}

\begin{tikzpicture}
% grid to see the coordinates
\draw[help lines, step=1] (0,0) grid (10,8);

% Point A with circle and label
\coordinate [label={[label distance=3mm]below:A}] (A) at (1,3);
\draw (A) circle [radius=3pt];

% Point B with circle and label
\coordinate [label={[label distance=3mm]right:B}](B) at (6,6);
\draw (B) circle [radius=3pt];

% first rectangle with default options: rounded corners=2mm, ultra thick
% offset = 0.3
\rectfoca{A}{B}{0.3};

% second rectangle with specified options
% offset = 0.8
\rectfoca[red, rounded corners=1mm, thick]{A}{B}{0.8};
\end{tikzpicture}
\end{document}
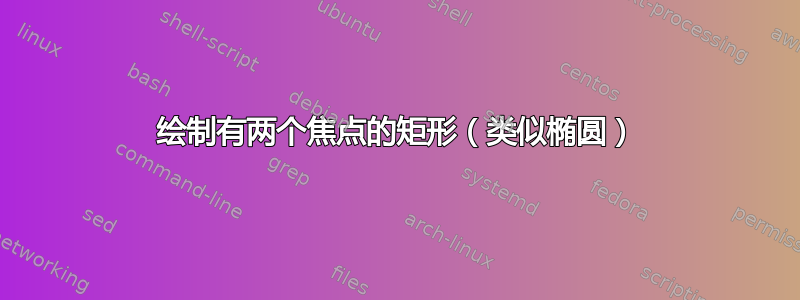
结果:

答案1
您可以将事物联系起来,并使用库中的语法pic进行所有计算。letcalc
\documentclass[tikz,border=5]{standalone}
\usetikzlibrary{calc}
\tikzset{pics/rectangle/.style args={foci (#1) and (#2) offset #3}{
  code={
    \path let \p1=(#1), \p2=(#2), \n1={atan2(\y2-\y1,\x2-\x1)},
      \n2={veclen(\y2-\y1, \x2-\x1)+2*(#3)}, \n3={#3} in
      [shift={(\p1)}, rotate=\n1, pic actions] (-\n3,-\n3) rectangle ++(\n2,2*\n3);
  }
}}
\begin{document}
\begin{tikzpicture}
\draw [help lines] grid (7,7);
\draw (1,3) circle [radius=1/9] coordinate [label=30:$A$]  (A);
\draw (6,6) circle [radius=1/9] coordinate [label=210:$B$] (B);
\draw (5,1) circle [radius=1/9] coordinate [label=120:$C$] (C);

\pic [draw, very thick, rounded corners=2pt]      {rectangle={foci (A) and (B) offset .3cm}};
\pic [draw=red, ultra thick, rounded corners=2pt] {rectangle={foci (A) and (B) offset .8cm}};
\pic [draw=green!75!black, dashed]    {rectangle={foci (A) and (C) offset .5cm}};
\pic [draw=blue, ultra thick, dotted] {rectangle={foci (B) and (C) offset .6cm}};

\end{tikzpicture}
\end{document}

答案2
您可以使用to path“宏”来创建绘图。
\documentclass[tikz,border=5]{standalone}
\usetikzlibrary{calc}
\tikzset{
  rect/.style= { to path={
    let \n1={sqrt(2)*#1},
        \p1=($(\tikztostart)!\n1!-135:(\tikztotarget)$), \p2=($(\tikztostart)!\n1!135:(\tikztotarget)$),
        \p3=($(\tikztotarget)!\n1!-135:(\tikztostart)$), \p4=($(\tikztotarget)!\n1!135:(\tikztostart)$)
        in
        (\p1) -- (\p2) -- (\p3) -- (\p4) --cycle}
  }
}
\begin{document}
  \begin{tikzpicture}[label distance=3mm]
    % grid to see the coordinates
    \draw[help lines] (0,0) grid (10,8);

    % demonstrate how it works
    \begin{scope}[ultra thick]
      \draw[green] (7,2) -- (9,2);
      % the parameter is relative to the path length (.5 x 2 = 1 here)
      \draw[blue] (7,2) to[rect=.5] (9,2);
      % or absolute
      \draw[purple] (7,2) to[rect=.5cm] (9,2);
    \end{scope}

    % Point A with circle and label
    \draw (1,3) coordinate[label=below:A] (A) circle(3pt);

    % Point B with circle and label
    \draw (6,6) coordinate[label=right:B] (B) circle(3pt);

    % draw rectangles
    \draw[rounded corners=2mm, ultra thick] (A) to[rect=.3cm] (B);
    \draw[red, rounded corners=1mm, thick] (A) to[rect=.8cm] (B);

  \end{tikzpicture}
\end{document}

更新:这也许有助于您了解它的工作to path风格rect。
