

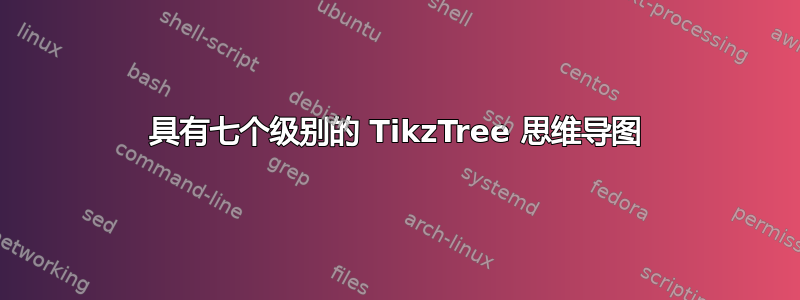
我想用 LaTeX 重新创建 860 个统计测试(假设检验)的思维导图。到目前为止,我找到了以下脚本:
\documentclass[border=10pt,multi,tikz]{standalone}
\usetikzlibrary{shapes.geometric}
\begin{document}

\tikzset{
treenode/.style = {draw,ellipse, align=left,
                 top color=white, bottom color=blue!20},
root/.style     = {treenode, font=\large, bottom color=white},
env/.style      = {treenode, font=\ttfamily\normalsize},
dummy/.style    = {circle,draw}
}
\begin{tikzpicture}
[
 level 1/.style={ edge from parent path={
        (\tikzparentnode) to[out=0, in=180] (\tikzchildnode)
        -- (\tikzchildnode)
    },},
level 2/.style={minimum width=200pt, edge from parent path={
        (\tikzparentnode.east) to[out=0, in=180] (\tikzchildnode.south west)
        -- (\tikzchildnode.south east)
    },
    sibling distance=0.6cm},
level 1/.append style={level distance=4.5cm},
level 2/.append style={level distance=6.5cm},
%edge from parent/.style = {draw, -latex},
%every node/.style       = {font=\footnotesize},
sloped,
     ]

 \node [root] {Algorithm}
[grow=right]
  child [sibling distance=4.0cm] { node{Clustering}
            child { node  {k-Means}}
            child { node  {k-Medians}}
            child { node  {Expectation Maximisation (EM)}}
            child { node  {Hierarchical Clustering}}
           }
child [sibling distance=4.5cm] { node {Bayesian}
            child { node  {Naive Bayes}}
            child { node  {Gaussian Naive Bayes}}
            child { node  {Multinomial Naive Bayes}}
            child { node  {Averaged One-Depen. Esti. (AODE)}}
            child { node  {Bayesian Belief Network (BBN)}}
            child { node  {Bayesian Network (BN)}}
           }
 child [sibling distance=0.5cm] { node {Decision Tree}
            child { node  {Classification and Regression Tree (CART)}}
            child { node  {Iterative Dichotomiser 3 (ID3)}}
            child { node  {C4.5 and C5.0}}
            child { node  {Chi-squared Auto.Inte. Det. (CHAID)}}
            child { node  {Decision Stump}}
            child { node  {M5}}
            child { node  {Conditional Decision Trees}}
           }
 child [sibling distance=5.5cm]{ node {Dimesionality Reduction}
            child { node  {[Principal Component Analysis (PCA)}}
            child { node  {Principal Component Regression (PCR)}}
            child { node  {Partial Least Squares Regression\\(PLSR)}}
            child { node  {Sammon Mapping}}
            child { node  {Multidimensional Scaling (MDS)}}
            child { node  {Projection Pursuit}}
            child { node  {Linear Discriminant Analysis (LDA)}}
            child { node  {Mixture Discriminant Analysis (MDA)}}
            child { node  {Quadratic Discriminant Analysis (QDA)}}
            child { node  {Flexible Discriminant Analysis (FDA)}}
           }
 child [sibling distance=5.cm] { node  {Regularisation}
            child { node  {Ridge Regression}}
            child { node  {Least Abs. Shr. and Sel. Ope. (LASSO)}}
            child { node  {Elastic Net}}
            child { node  {Least-Angle Regression (LARS)}}
           };
\tikzset{
level 1/.style={ edge from parent path={
        (\tikzparentnode) to[out=180, in=0] (\tikzchildnode)
        -- (\tikzchildnode)
    }},
level 2/.style={minimum width=200pt,align=left, edge from parent path={
        (\tikzparentnode) to[out=180, in=0] (\tikzchildnode.south east)
        -- (\tikzchildnode.south west)
    },
    sibling distance=0.6cm},
level 1/.append style={level distance=4.5cm},
level 2/.append style={level distance=5.5cm},
%edge from parent/.style = {draw, -latex},
%every node/.style       = {font=\footnotesize},
sloped,
     }
  \node [root]{Algorithm}
 [grow=left]
 child [sibling distance=3.1cm]{ node{Deep Learning}
            child { node  {Deep Boltzmann Machine (DBM)}}
            child { node  {Deep Belief Network (DBN)}}
            child { node  {Convolutional Neural Network (CNN)}}
            child { node  {Stacked Auto-Encoders}}
           }
   child [sibling distance=2.8cm]{ node {Ensamble}
            child { node  {Boosting}}
            child { node  {Bootstrapped Aggregation (Bagging)}}
            child { node  {AdaBoost}}
            child { node  {Stacked Generalization (blending)}}
            child { node  {Gradient Boosting Machines (GBM)}}
            child { node  {Gradient Boosted Regr. Trees (GBRT)}}
            child { node  {Random Forest}}
           }
    child { node{Neural Networks}
            child { node  {Perceptron}}
            child { node  {Back-Propagation}}
            child { node  {Hopfield Network}}
            child { node  {Radial Basis Function Net. (RBFN)}}
           }
   child[sibling distance=3.9cm] { node {Insatnce Based}
           child { node  {k-Nearest Neighbour(KNN)}}
           child { node  {Learning vector quantization(LVQ)}}
           child { node  {self-organised map}}
           child { node  {Locally Weighted Learning(LWL)}}
           }
  child[sibling distance=3.2cm] { node {Rule system}
           child { node  {Cubist}}
           child { node  {One Rule (OneR)}}
           child { node  {Zero Rule (ZeroR)}}
           child { node  {Rep.Inc.Pr2pro. Err. Red. (RIPPER)}}
           }
  child [sibling distance=3.3cm]{ node  {Regression}
            child { node  {Linear}}
            child { node  {Ordinary Least Squares}}
            child { node  {Logistic}}
            child { node  {Stepwise}}
            child { node  {Locally Esti.Scatt. Smoo.(LOESS)}}
            child { node  {Multi. Ada. Reg.Splines (MARS)}}
            };
 \end{tikzpicture}
\end{document}
得出:

但是我在添加第 3 级时已经卡住了,这样看起来就好了。我甚至无法理解第 3 级的机制,所以我已经知道我也会在第 4、5、6 和 7 级遇到问题。
任何帮助是极大的赞赏。
答案1
一些指导。
pgfmanual 中的最后一个教程涉及思维导图但对于初学者来说,这可不是一顿轻松的饭菜Tikz。我宁愿让你注意第21章 让树木生长,如果需要的话,树木图书馆以下内容以第 21 章为指导。
我给你看的是:
- 右节点,向右生长一棵树
- 左节点也一样
- 最后在中间再画一个(例如,你可以事先将其分别放置在(0,0)处)
只要您设法遵循语法,child{ node {text} }您就可以继续前进;频繁编译有助于阻止错误(通常是括号)传播。
如您所见,原则上您可以扩展到(许多)任何级别。但很快您就会遇到定位问题。这就是级别特定的格式/样式发挥作用的地方,它允许您定位特定子级别的成员。请参阅第 21.4 章。


\documentclass[10pt,border=3mm,tikz]{standalone}

\begin{document}
 \begin{tikzpicture}
    % ~~~ a tree to the right ~~~~~~
    \node (R) at (2,0) {root-R} [grow=right]
        child{node {1-1}
            child{node {2-1}}
            child{node {2-2}
                child{node {3-1}}
                child{node {3-2}
                }% closes 3-2
            }% closes 2-2
        }% closes 1-1
        child{node {1-2}
            child{node {2-2}}
        }
        ;

    % ~~~ a tree to the left ~~~~~~
    \node (L) at (-2,0) {root-L} [grow=left]
        child{node {1-1}}
        child{node {1-2}}
        ;

    % ~~~ let's draw sth. inbetween ~~~~
    \draw (L) -- node[fill=white,draw=blue] {roots root} (R);

 \end{tikzpicture}
\end{document}
你贴出的代码基本都是这个意思,把一些定位控制权交给了一些子元素,在语句中总结了很多与外观相关的样式\tikzset{}。
我建议从小处着手,即“从文本外观和布局点缀方面进行裸露”,然后逐步引入一级又一级。